Skip to content


Email that lands.Design that works.Pricing that won’t burn your budget.
Design beautiful emails, automate your flows, and deliver reliably.
You only pay for the emails you send. No overpriced contact-based subscriptions.
Feedback from our inbox
GV
Gabriel VaraljayFounder of TrendFingers.com
I’ve been using Blue Fox to send out my newsletters, and I couldn’t be happier. The system integrates seamlessly with my own AWS SES, giving me full control and transparency without the hefty price tag of overpriced black-box solutions like Mailchimp. It’s an excellent choice for anyone seeking reliability and efficiency.
For designers
Create pixel-perfect designs without coding
Build flawless emails with the most powerful no-code editor. If it’s possible in email, you can create it here!
Maintain coherent design for all of your emails
Keep every email on-brand with a unified design system: set global styles, save reusable blocks, and ensure consistency across transactional, product, and marketing emails.
Brand 1
Brand 2
Brand 3
No more email rendering issues
Your emails will look perfect everywhere. Our battle-tested email HTML ensures flawless rendering across all major email clients, including Outlook.
For marketers
Craft thoughtful email journeys
Create seamless, considerate email workflows that engage the right people at the right time.
Effortless content editing
Quickly refine your email content with our intuitive, no-code editor.
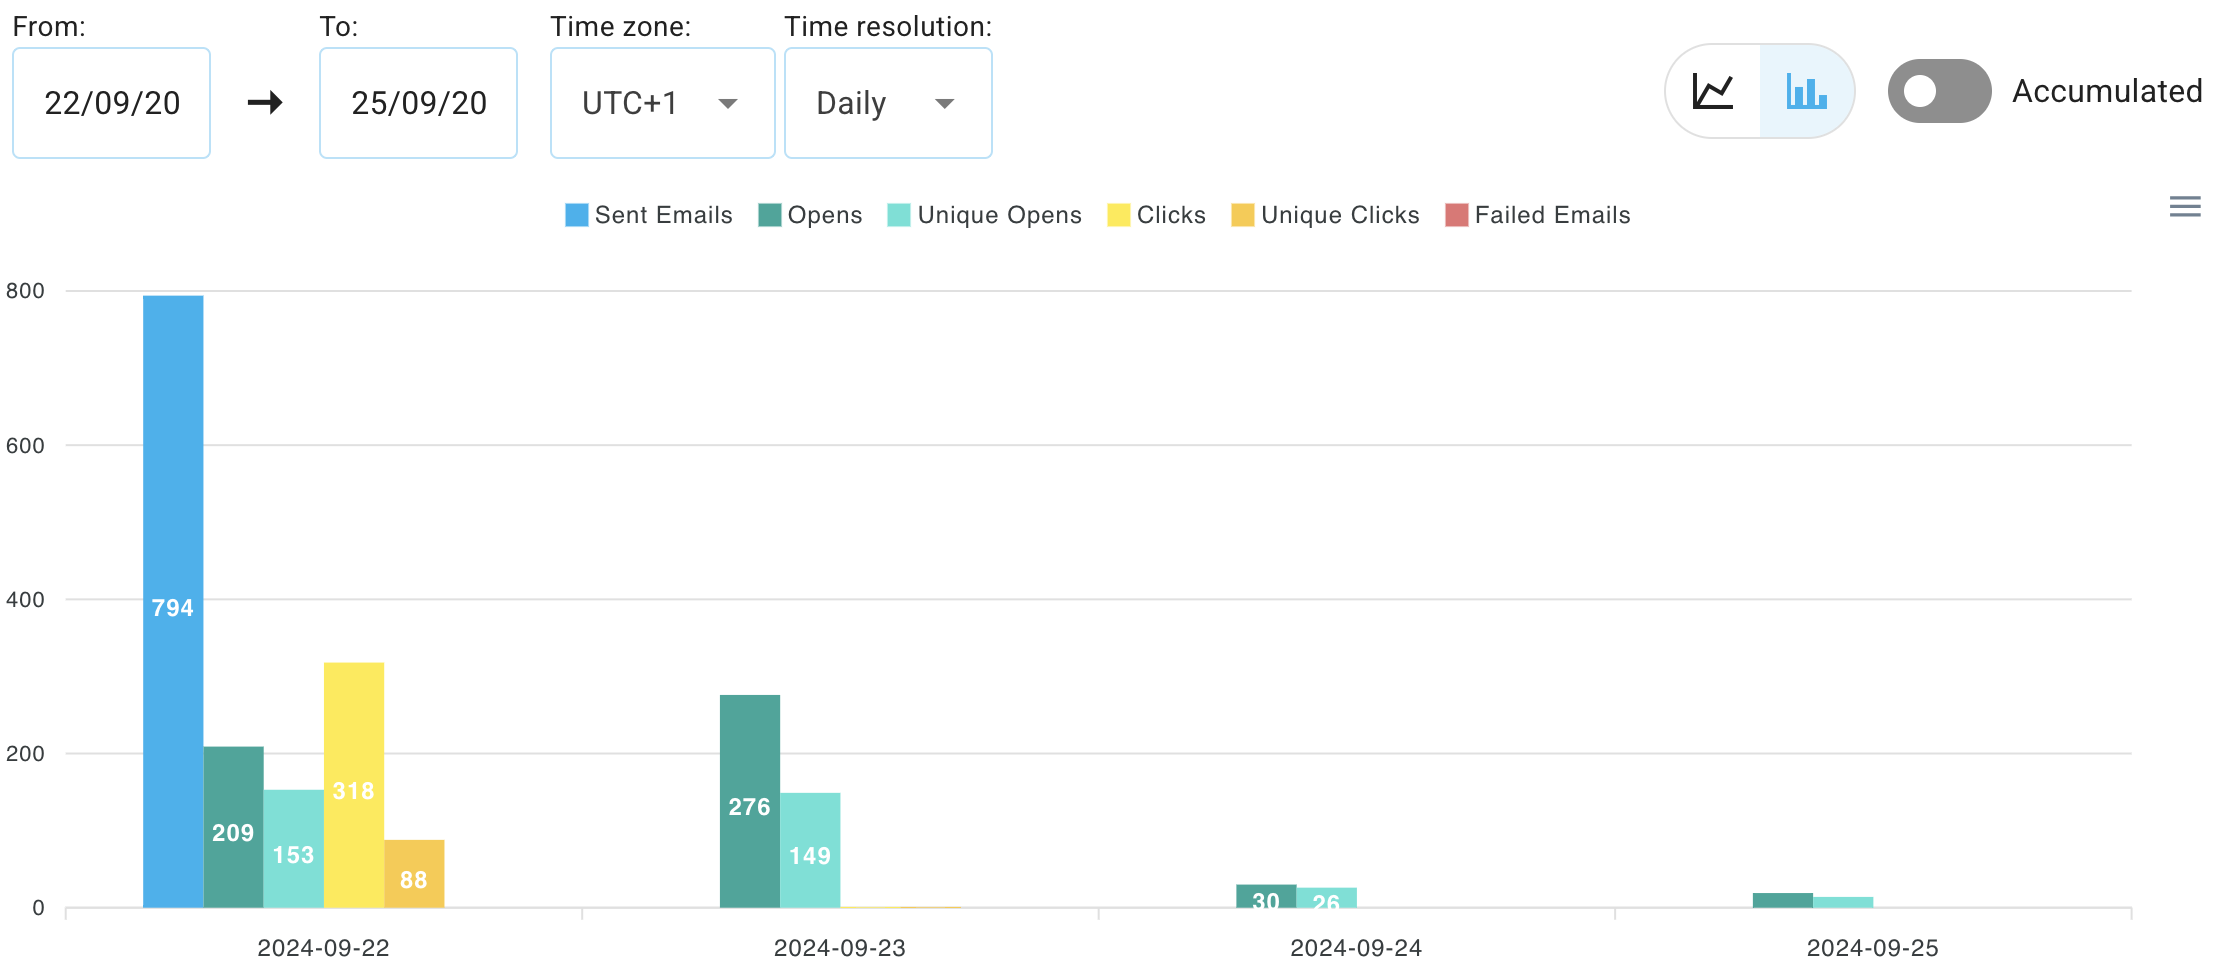
Understand your audience
Track engagement, segment smarter, and fine-tune your emails to drive more conversions.
For developers
Easy integration
Simple, technology-agnostic API
POSThttps://api.bluefox.email/v1/subscriber-lists/##YOUR_SUBSCRIBER_LIST_ID##json
{
  "name": "Jon Doe",
  "email": "jon@doe.com"
}Bring your own Amazon SES
The gold-standard of great deliverability
Using your own AWS SES with bluefox.email gives you full control over your sender reputation while still benefiting from AWS's infrastructure. Since you connect your own AWS account, your email campaigns are isolated from other users' activities, ensuring better control over deliverability and security. You get the reliability and performance of AWS SES, but with the added assurance that only your actions affect your email sending reputation.
If needed, you can easily upgrade to dedicated IPs through AWS SES for even greater control and improved deliverability.
Send consistent-looking & beautiful emails today!
Email communication is part of your product! Don't let it ruin your users' experience with your brand!