Appearance
Email Personalization (Merge Tags)
This guide shows you how to personalize your emails in bluefox.email using merge tags powered by Handlebars. Whether you're sending transactional, triggered, or campaign emails, this doc covers everything you need to know—step by step.
Email personalization is essential for modern companies. You need to grab your customers' attention—otherwise, they won’t click or open your next email. Sending thoughtful, personalized messages increases the chances that your users will enjoy your emails.
At bluefox.email, we use handlebars for personalization. This means you can include merge tags in your emails using the {{mustacheSyntax}} format.
There are two primary ways to refer to data in your emails:
- Send the data with your request
- Use data from bluefox.email
A straightforward way to personalize an email is by sending data with your API call. This is only available for transactional and triggered emails. For example, if you want to include a user's favorite animal, add a favoriteAnimal property to your request:
json
...
"data": {
  "favoriteAnimal": "fox"
},
...
Within your email, you can then use the {{favoriteAnimal}} merge tag: 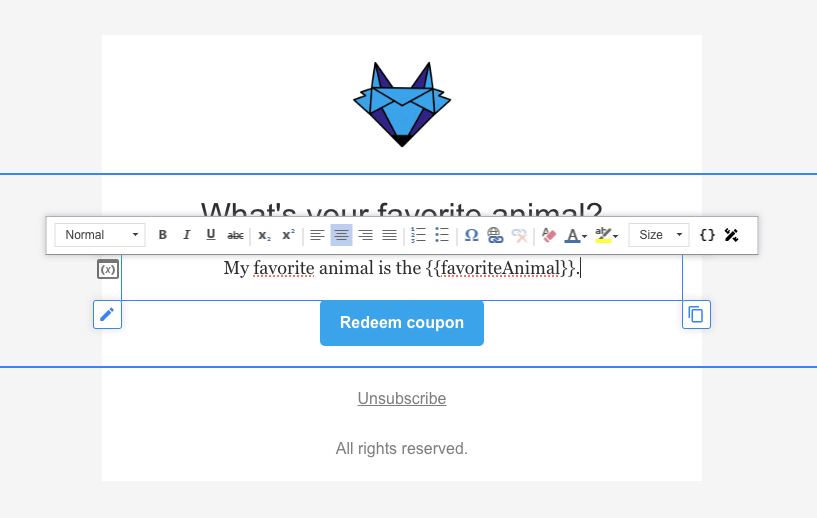
As you might expect, the email sent will look like this: 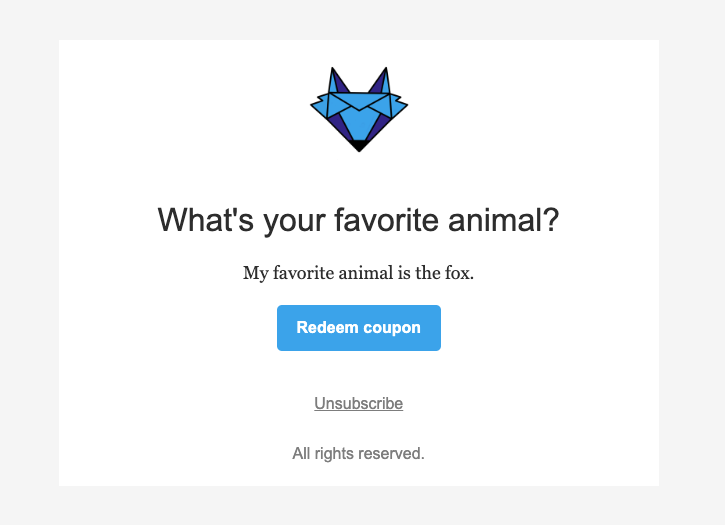
You can also personalize emails using data stored in bluefox.email. This is explained in the next two sections: "Built-in Merge Tags" and "Contact Properties".
Quick Reference
Built-in Tags
- {{contact.email}}
- {{unsubscribeLink}}
- {{pauseSubscriptionLink}}
Contact Properties
- {{contact.firstName}}, {{contact.lastName}}, etc. (Depends on what contact properties you define.)
Conditionals
- {{#if (AND condition1 condition2)}}
- {{#if (OR condition1 condition2)}}
- {{#if (NOT condition)}}
- {{#if (EQ a b)}}
- {{#if (INCLUDES array value)}}
Loops
- {{#each items}}, {{#each items skip=1 limit=3}}
String Helpers
- {{CAPITALIZE string}}
- {{TRUNCATE string num}}
Built-in Merge Tags
There are a few built-in variables you can use in your emails without needing to send them in your request. These are also available in campaigns.
Contact's Email Address
The simplest example is the contact's email address:
{{contact.email}}This variable is always available in all emails.
Unsubscribe Link
Every non-transactional email must include an unsubscribe link. Use the following merge tag to insert it:
{{unsubscribeLink}}This variable is not available in transactional emails.
Pause Subscription Link
Similarly, you can insert a pause subscription link into your email. When users click this link, the unsubscribe option will be hidden on the subscription preferences page.
{{pauseSubscriptionLink}}This variable is also not available in transactional emails.
Contact Properties
Contact properties are also available without needing to send them in your request.
As you saw earlier, there's a built-in property for the contact's email address:
{{contact.email}}Beyond that, all other contact properties are optional. You can add or remove as many as you'd like. These properties can be updated through API calls or directly from the UI.
You can access contact properties via the contact object, just like before. So, for example, if you defined a firstName property for your contacts, you could refer to it with:
{{contact.firstName}}Text Personalization
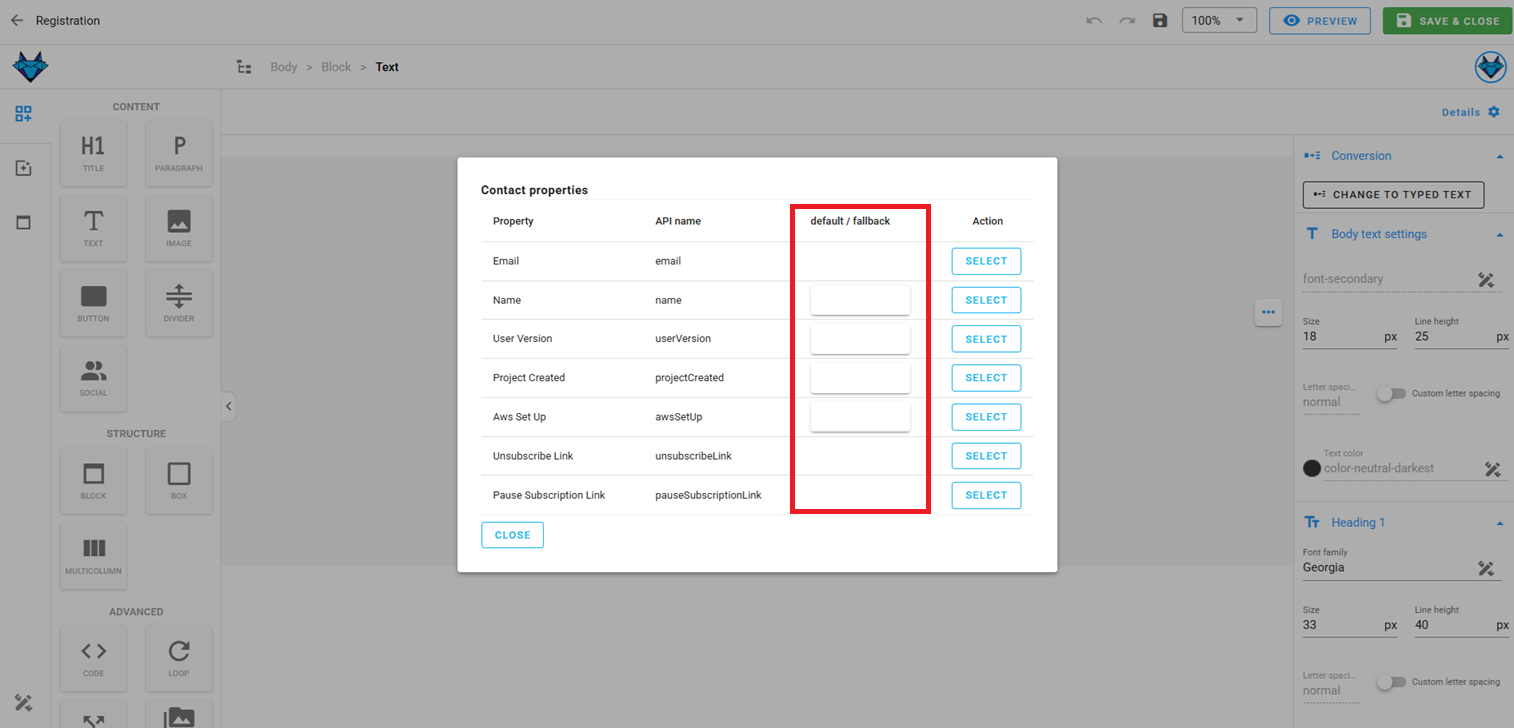
When it comes to personalization, probably the most important thing is to personalize text. Besides typing in the merge tags manually, while editing a text element you can also click the merge tag button highlighted in the screenshot below:
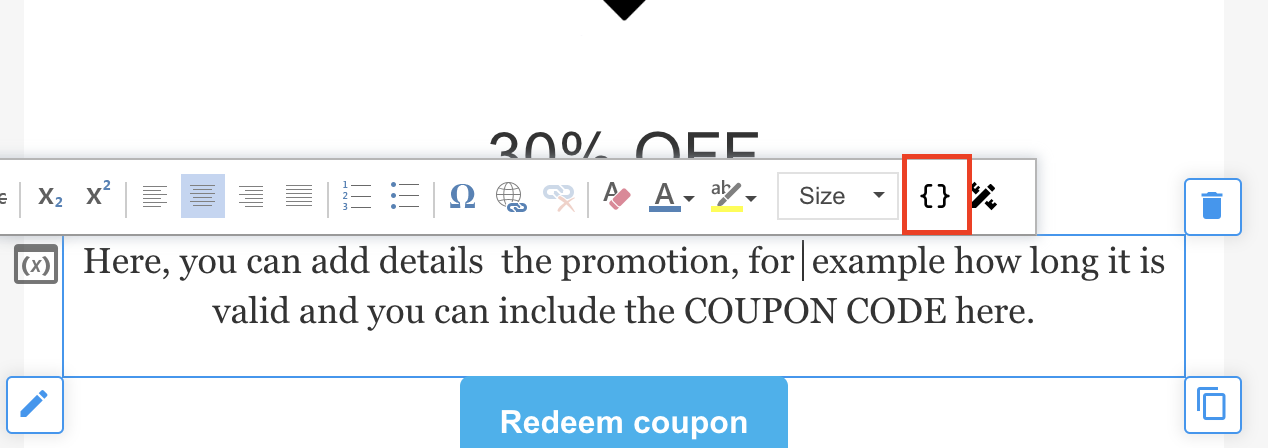
It will open a dialog that contains all the available built-in merge tags and any contact-related merge tags you've defined.
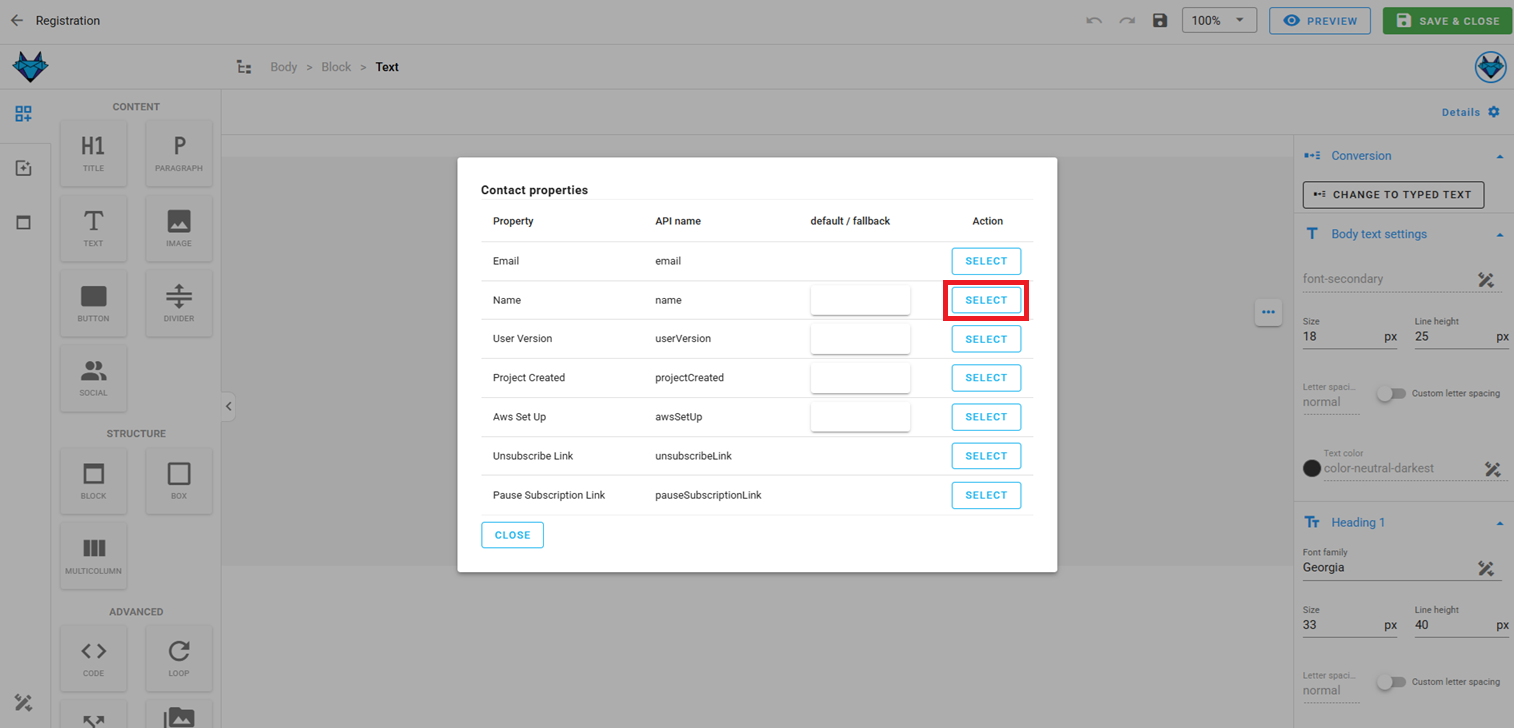
Here, you can also set a default value. This value will be used if the actual value is missing or empty.
You cannot set default values for mandatory fields (eg. emails)
You just need to click the one you want to insert.

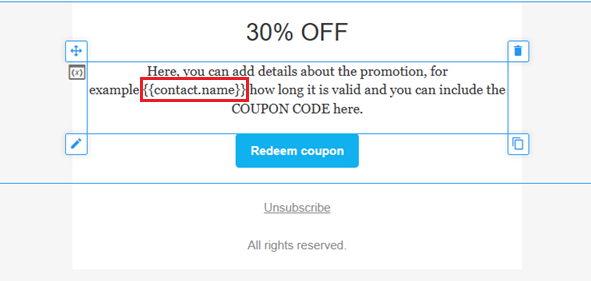
This is how it will look if there are no default values set:
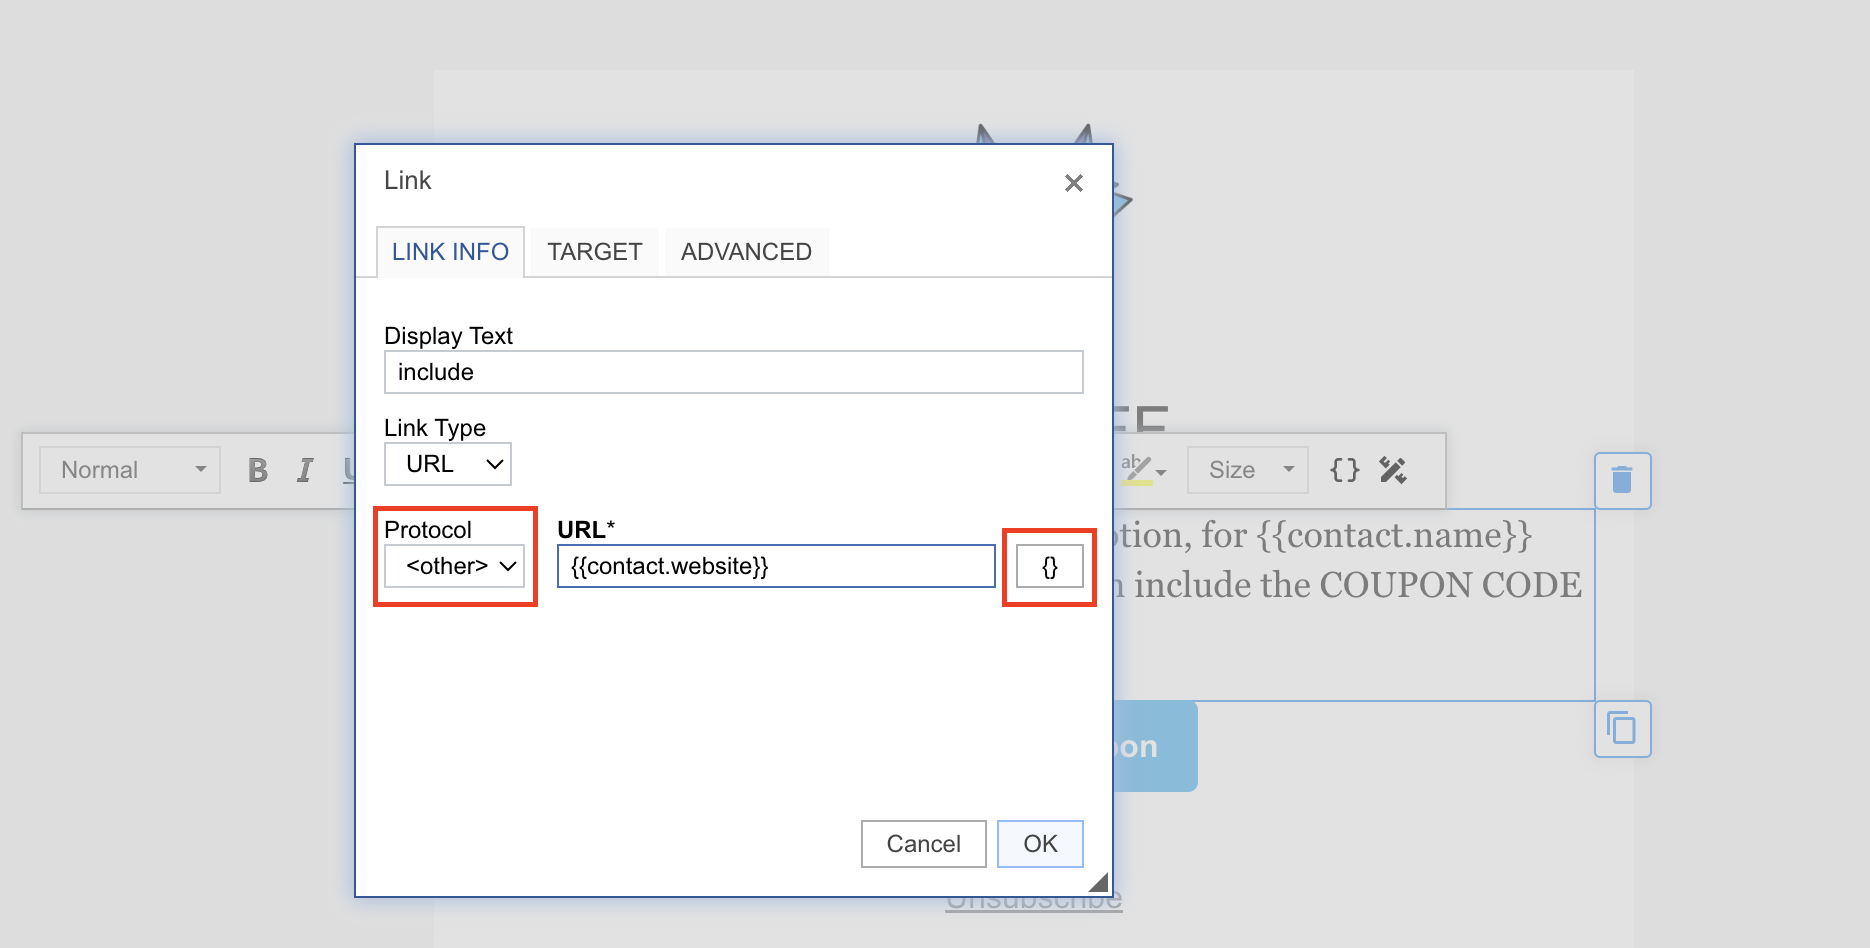
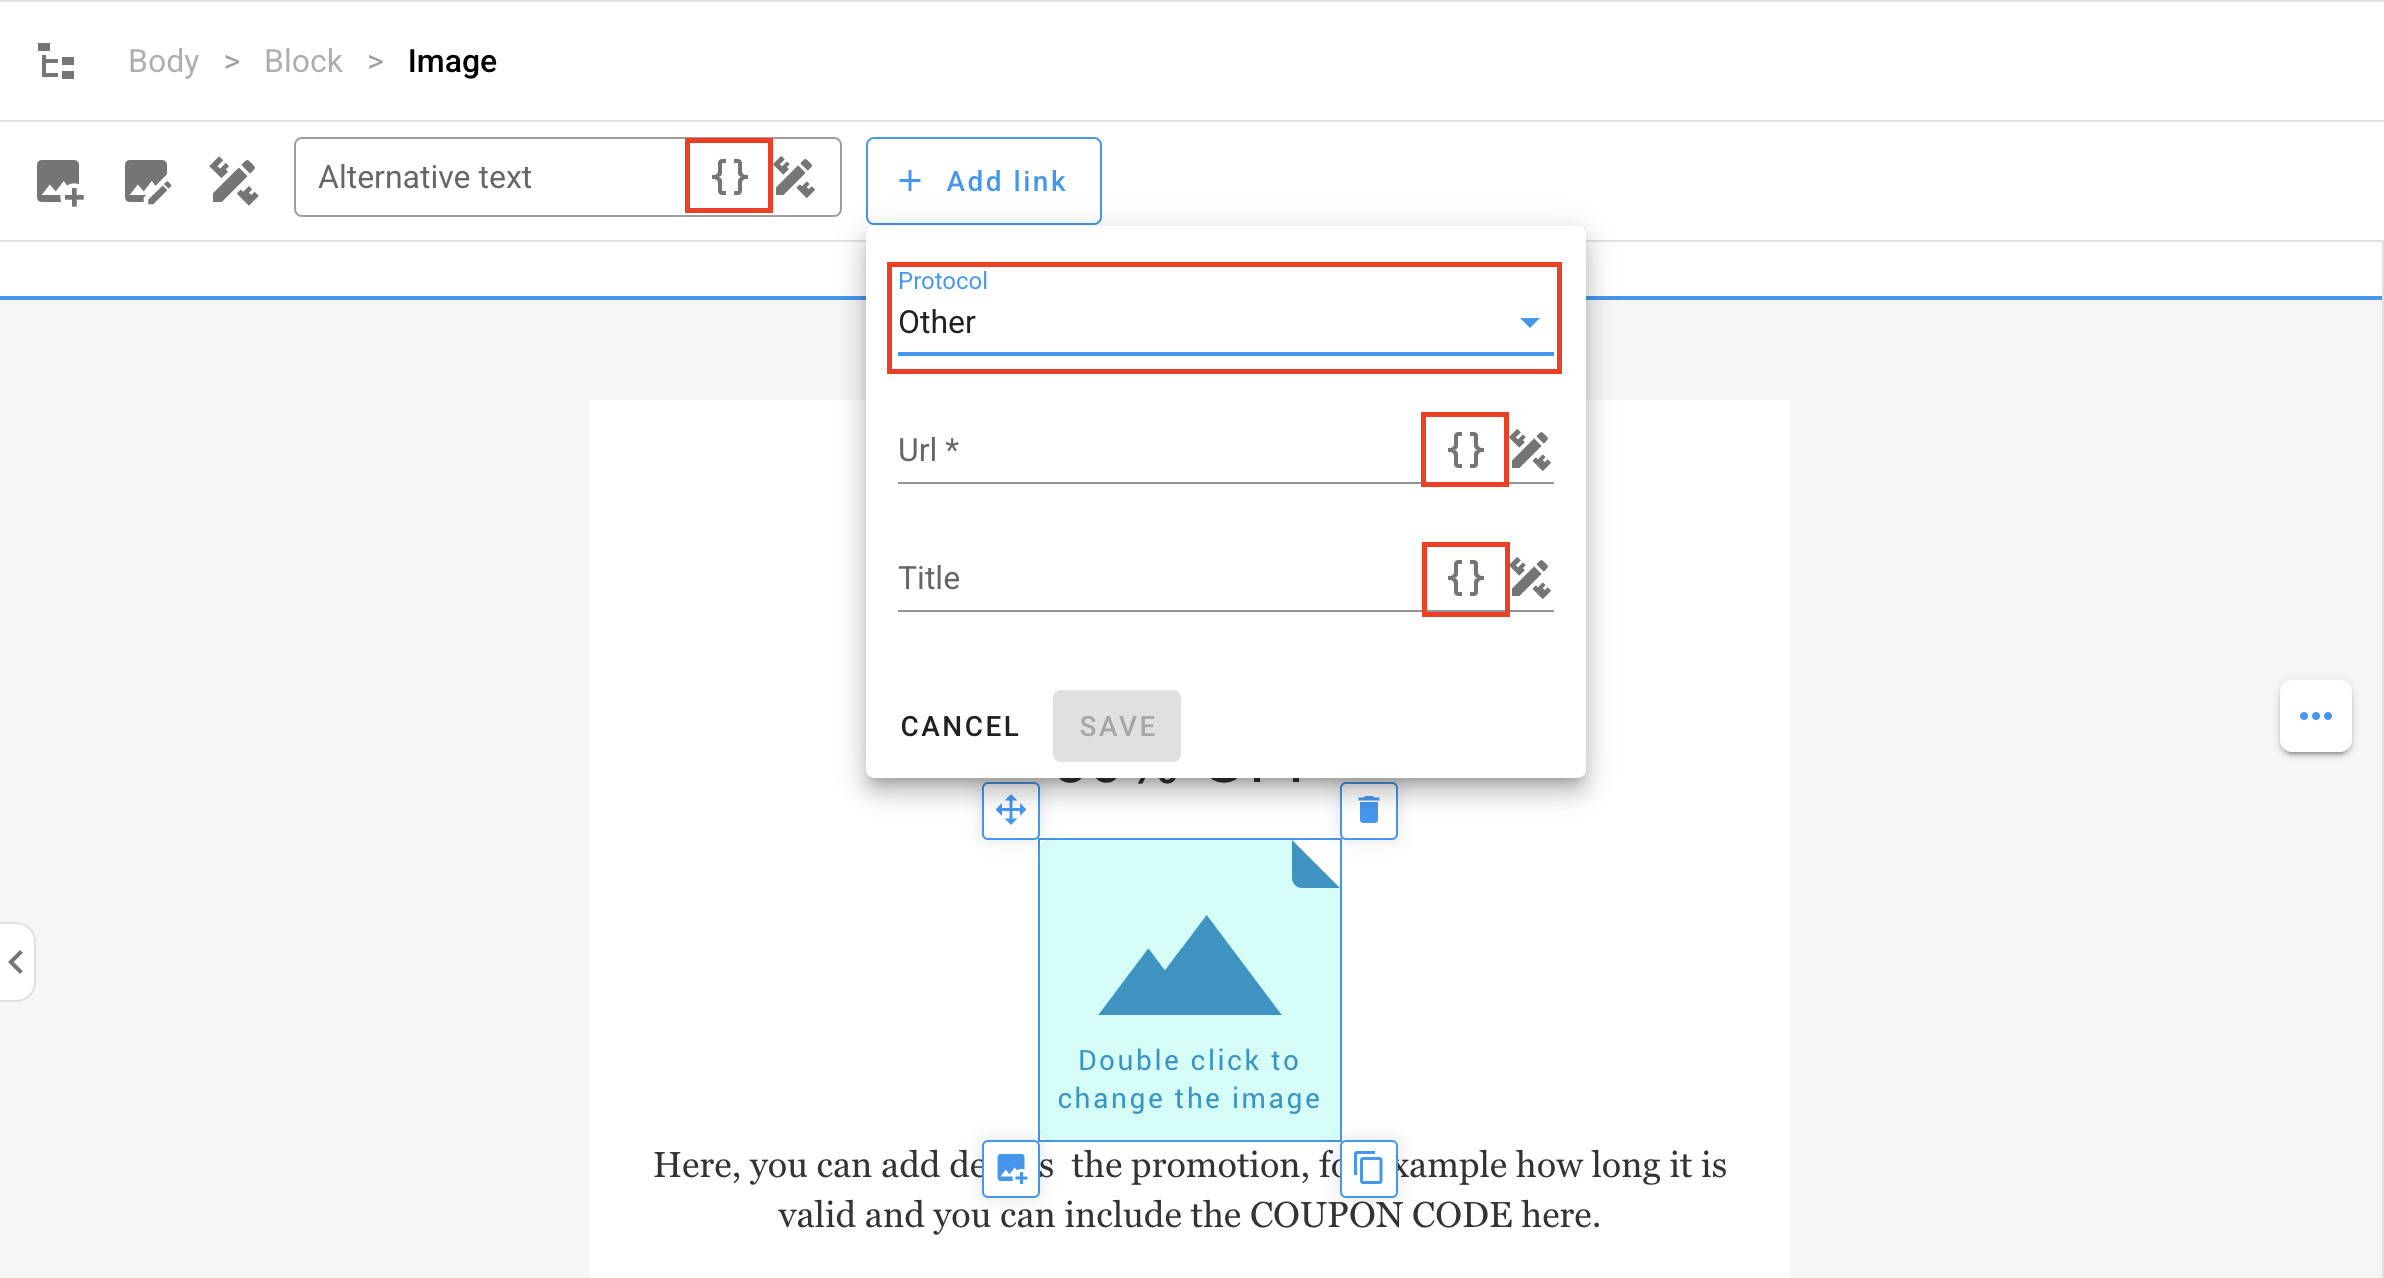
You can also use merge tags in links within your text. Open the link dialog by clicking the highlighted icon:
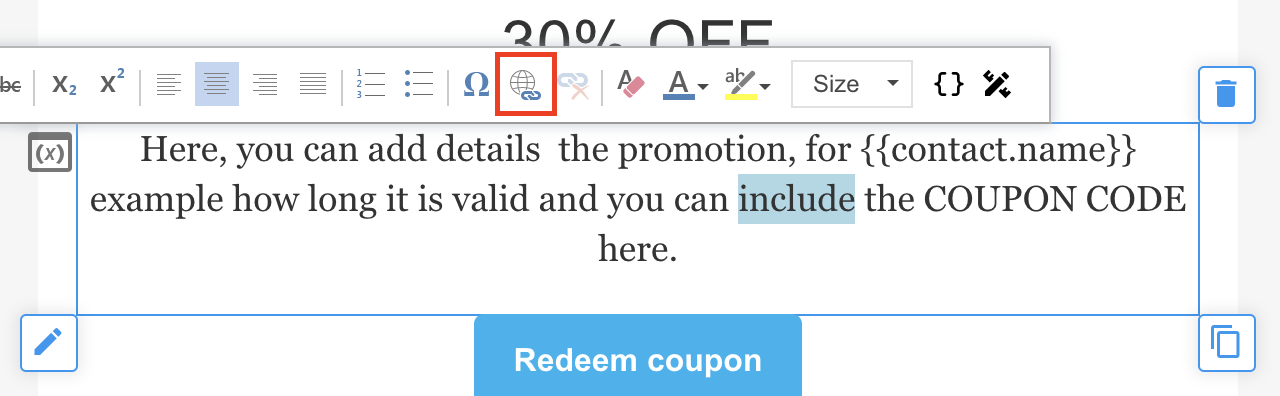
You'll see the merge tag icon on the right-hand side. That opens the same dialog shown earlier. Keep in mind that if the link from your merge tag already includes a protocol (e.g., https://), you need to change the protocol option to Other.
If you want to refer to data passed in the request body when sending a triggered or transactional email, you’ll need to type the merge tag manually. Just follow the object structure from your request. For example, if you send:
json
...
"body": {
  "parent": {
    "name": "Joe Doe"
  }
}
...
And you want to refer to the parent's name, use:
{{parent.name}}Button Personalization
For button elements, you can set the src (URL) using merge tags. Just like with text links, make sure to change the protocol to Other if the merged value already contains a protocol like https://.
You can also personalize the title attribute of the link, which shows up as a tooltip when someone hovers over the button in the email.
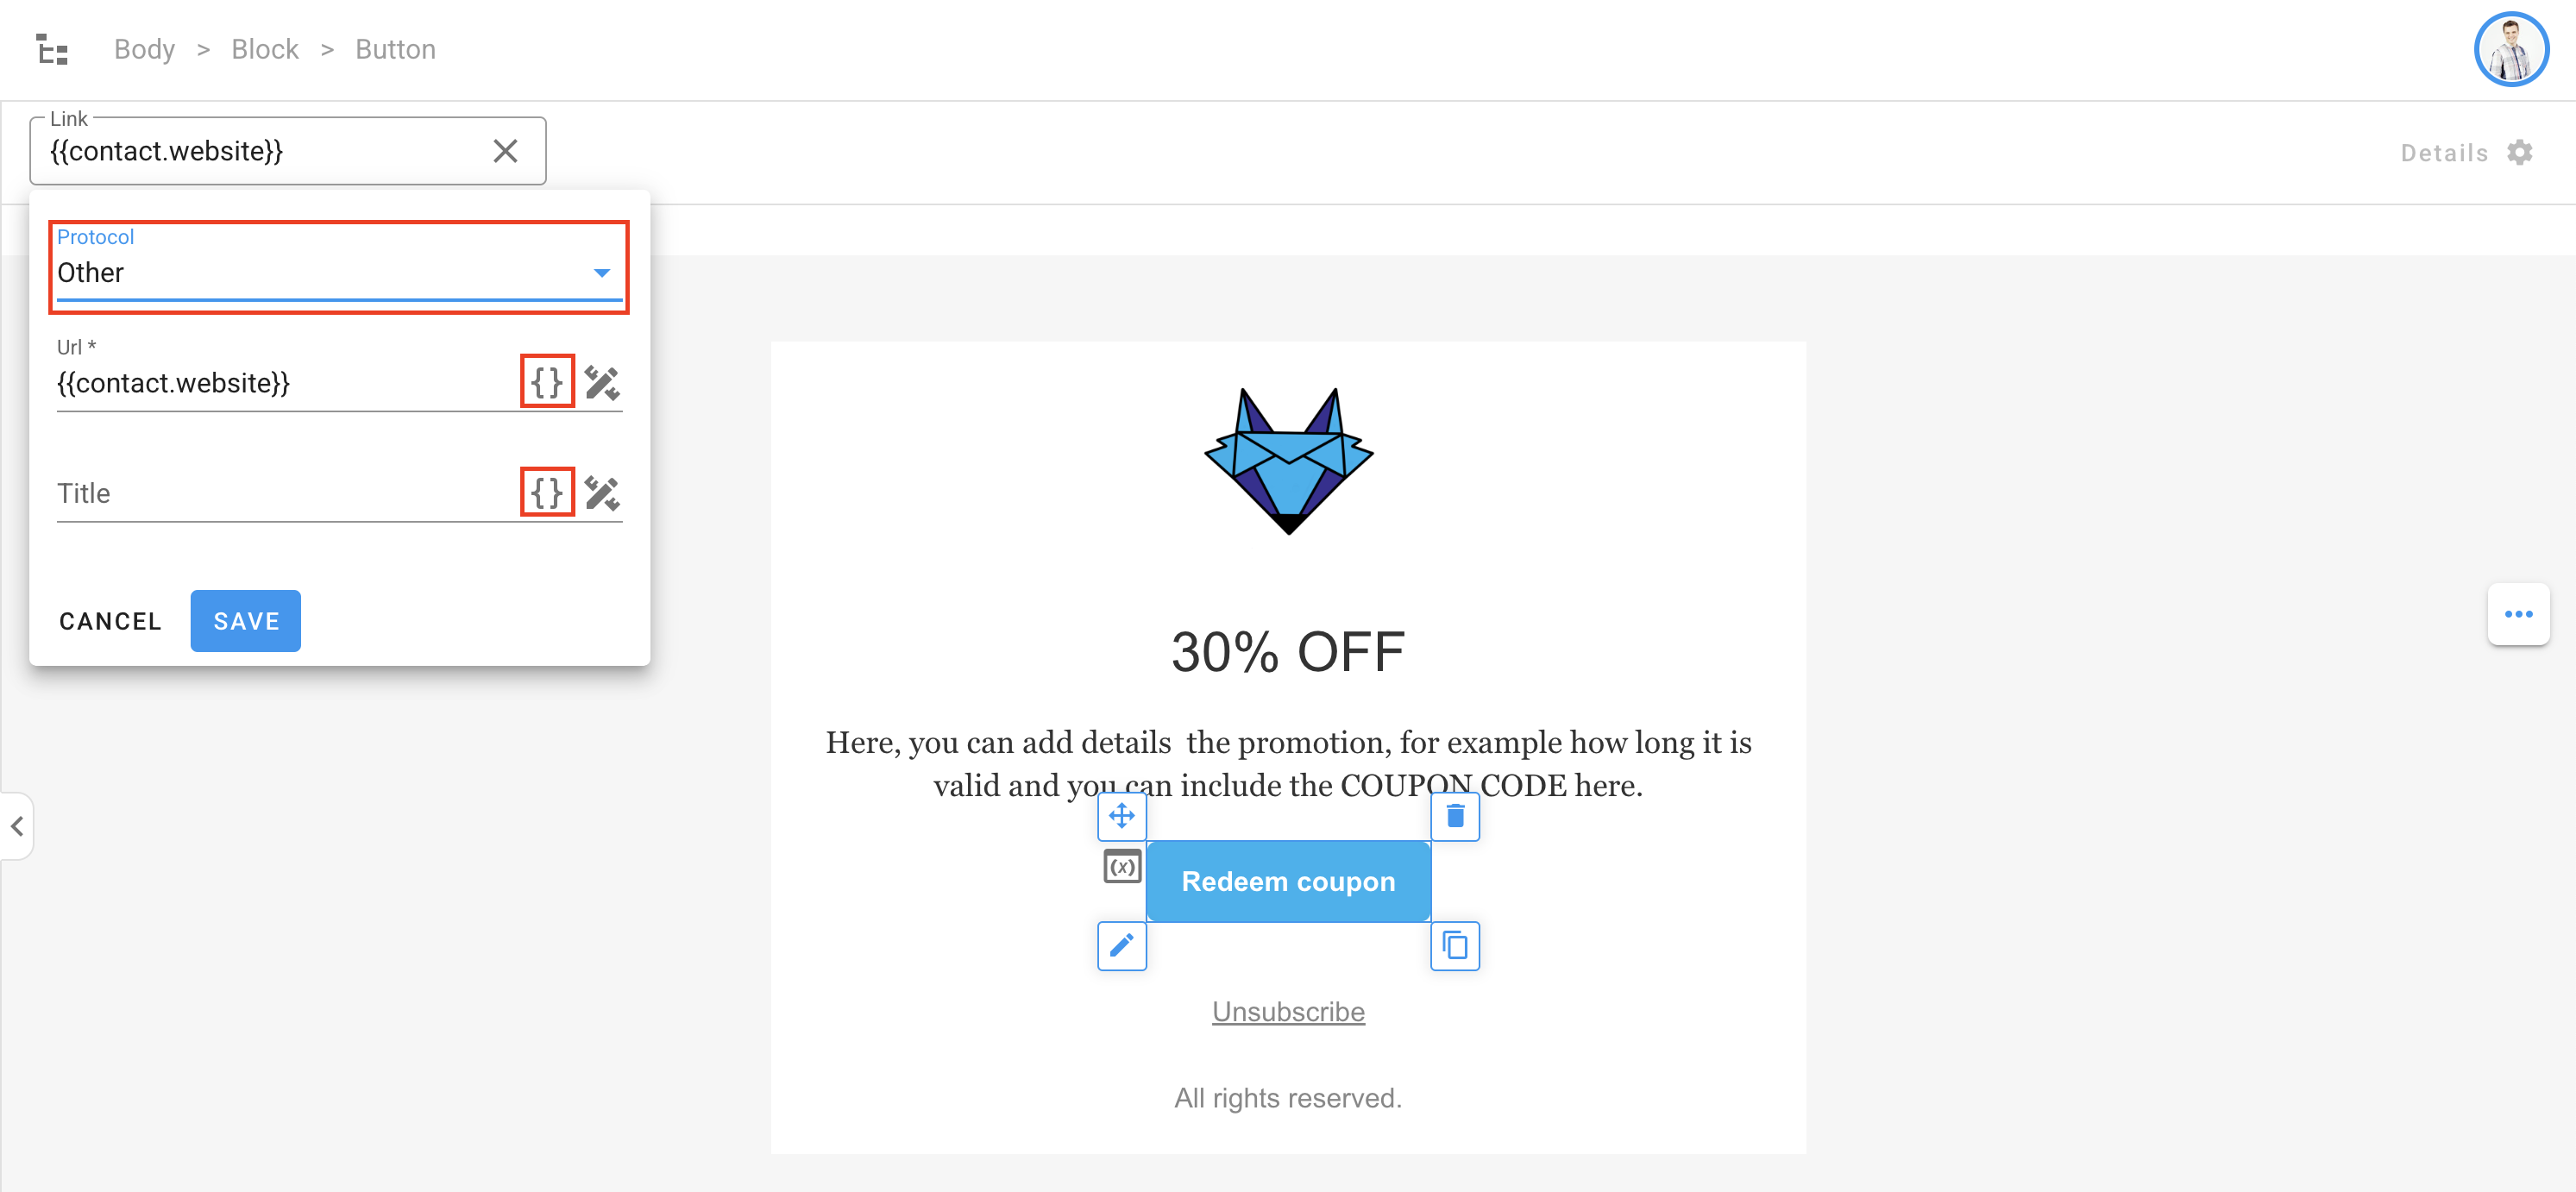
Image Personalization
Just like buttons, you can customize the link around an image using merge tags. You can also set the alt text of the image, which is useful for accessibility—screen readers can’t read images, but they can read alt text!
If you also need to personalize the image itself (for example, to show a user’s profile picture), use a Dynamic Image. Dynamic images in the editor are placeholders—their src is set at send time by replacing a merge tag with a real link.
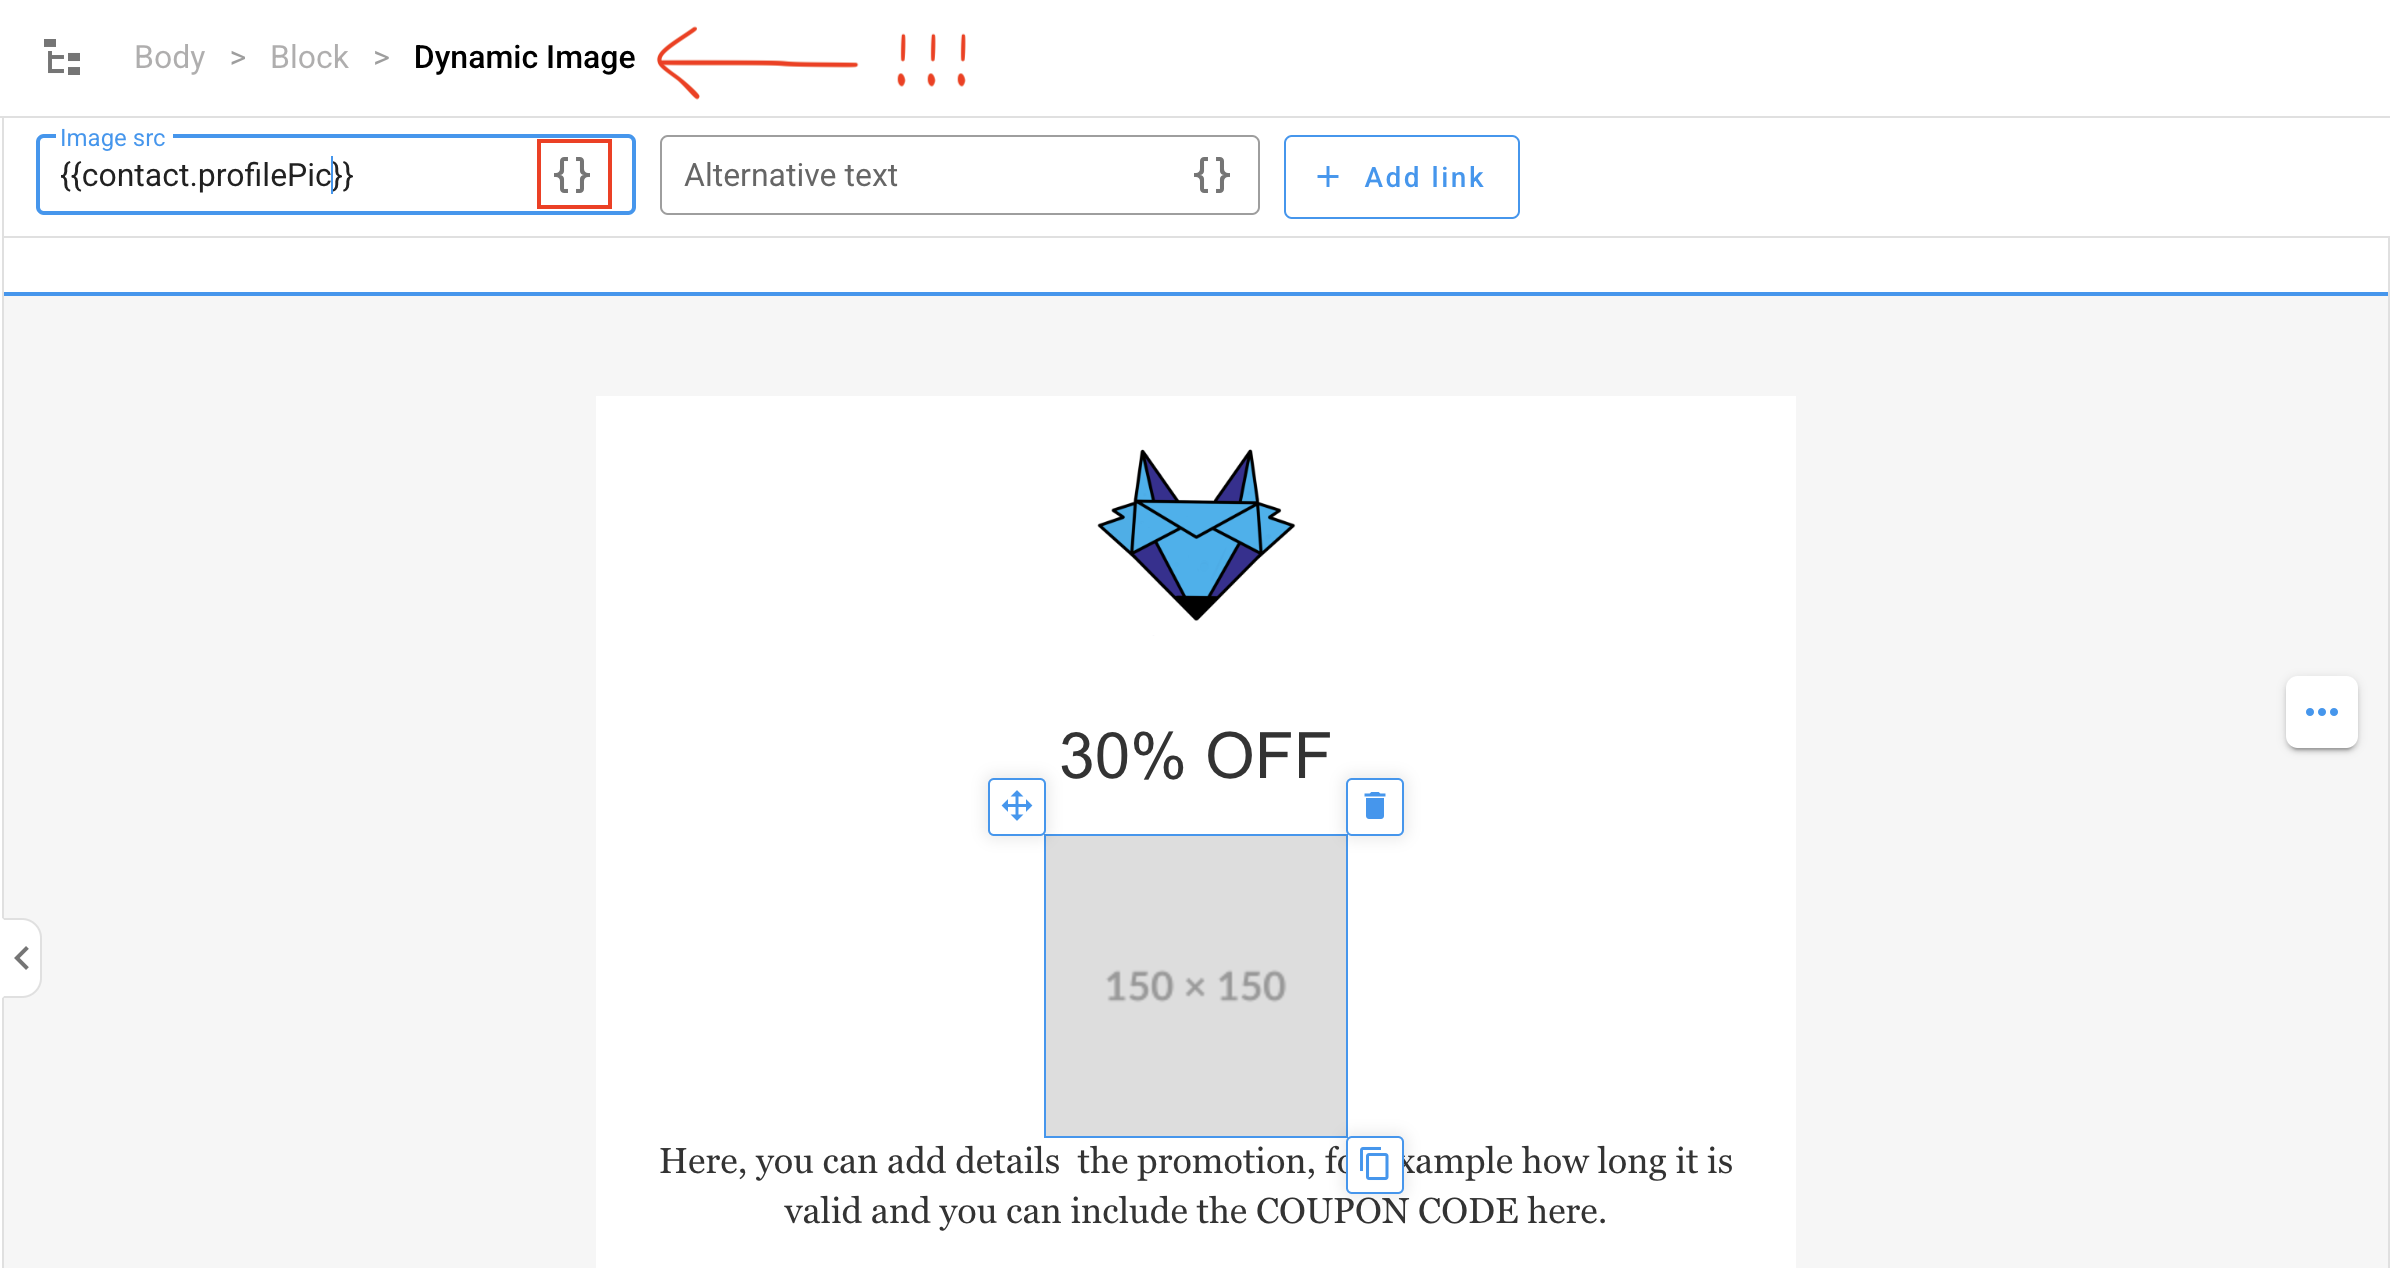
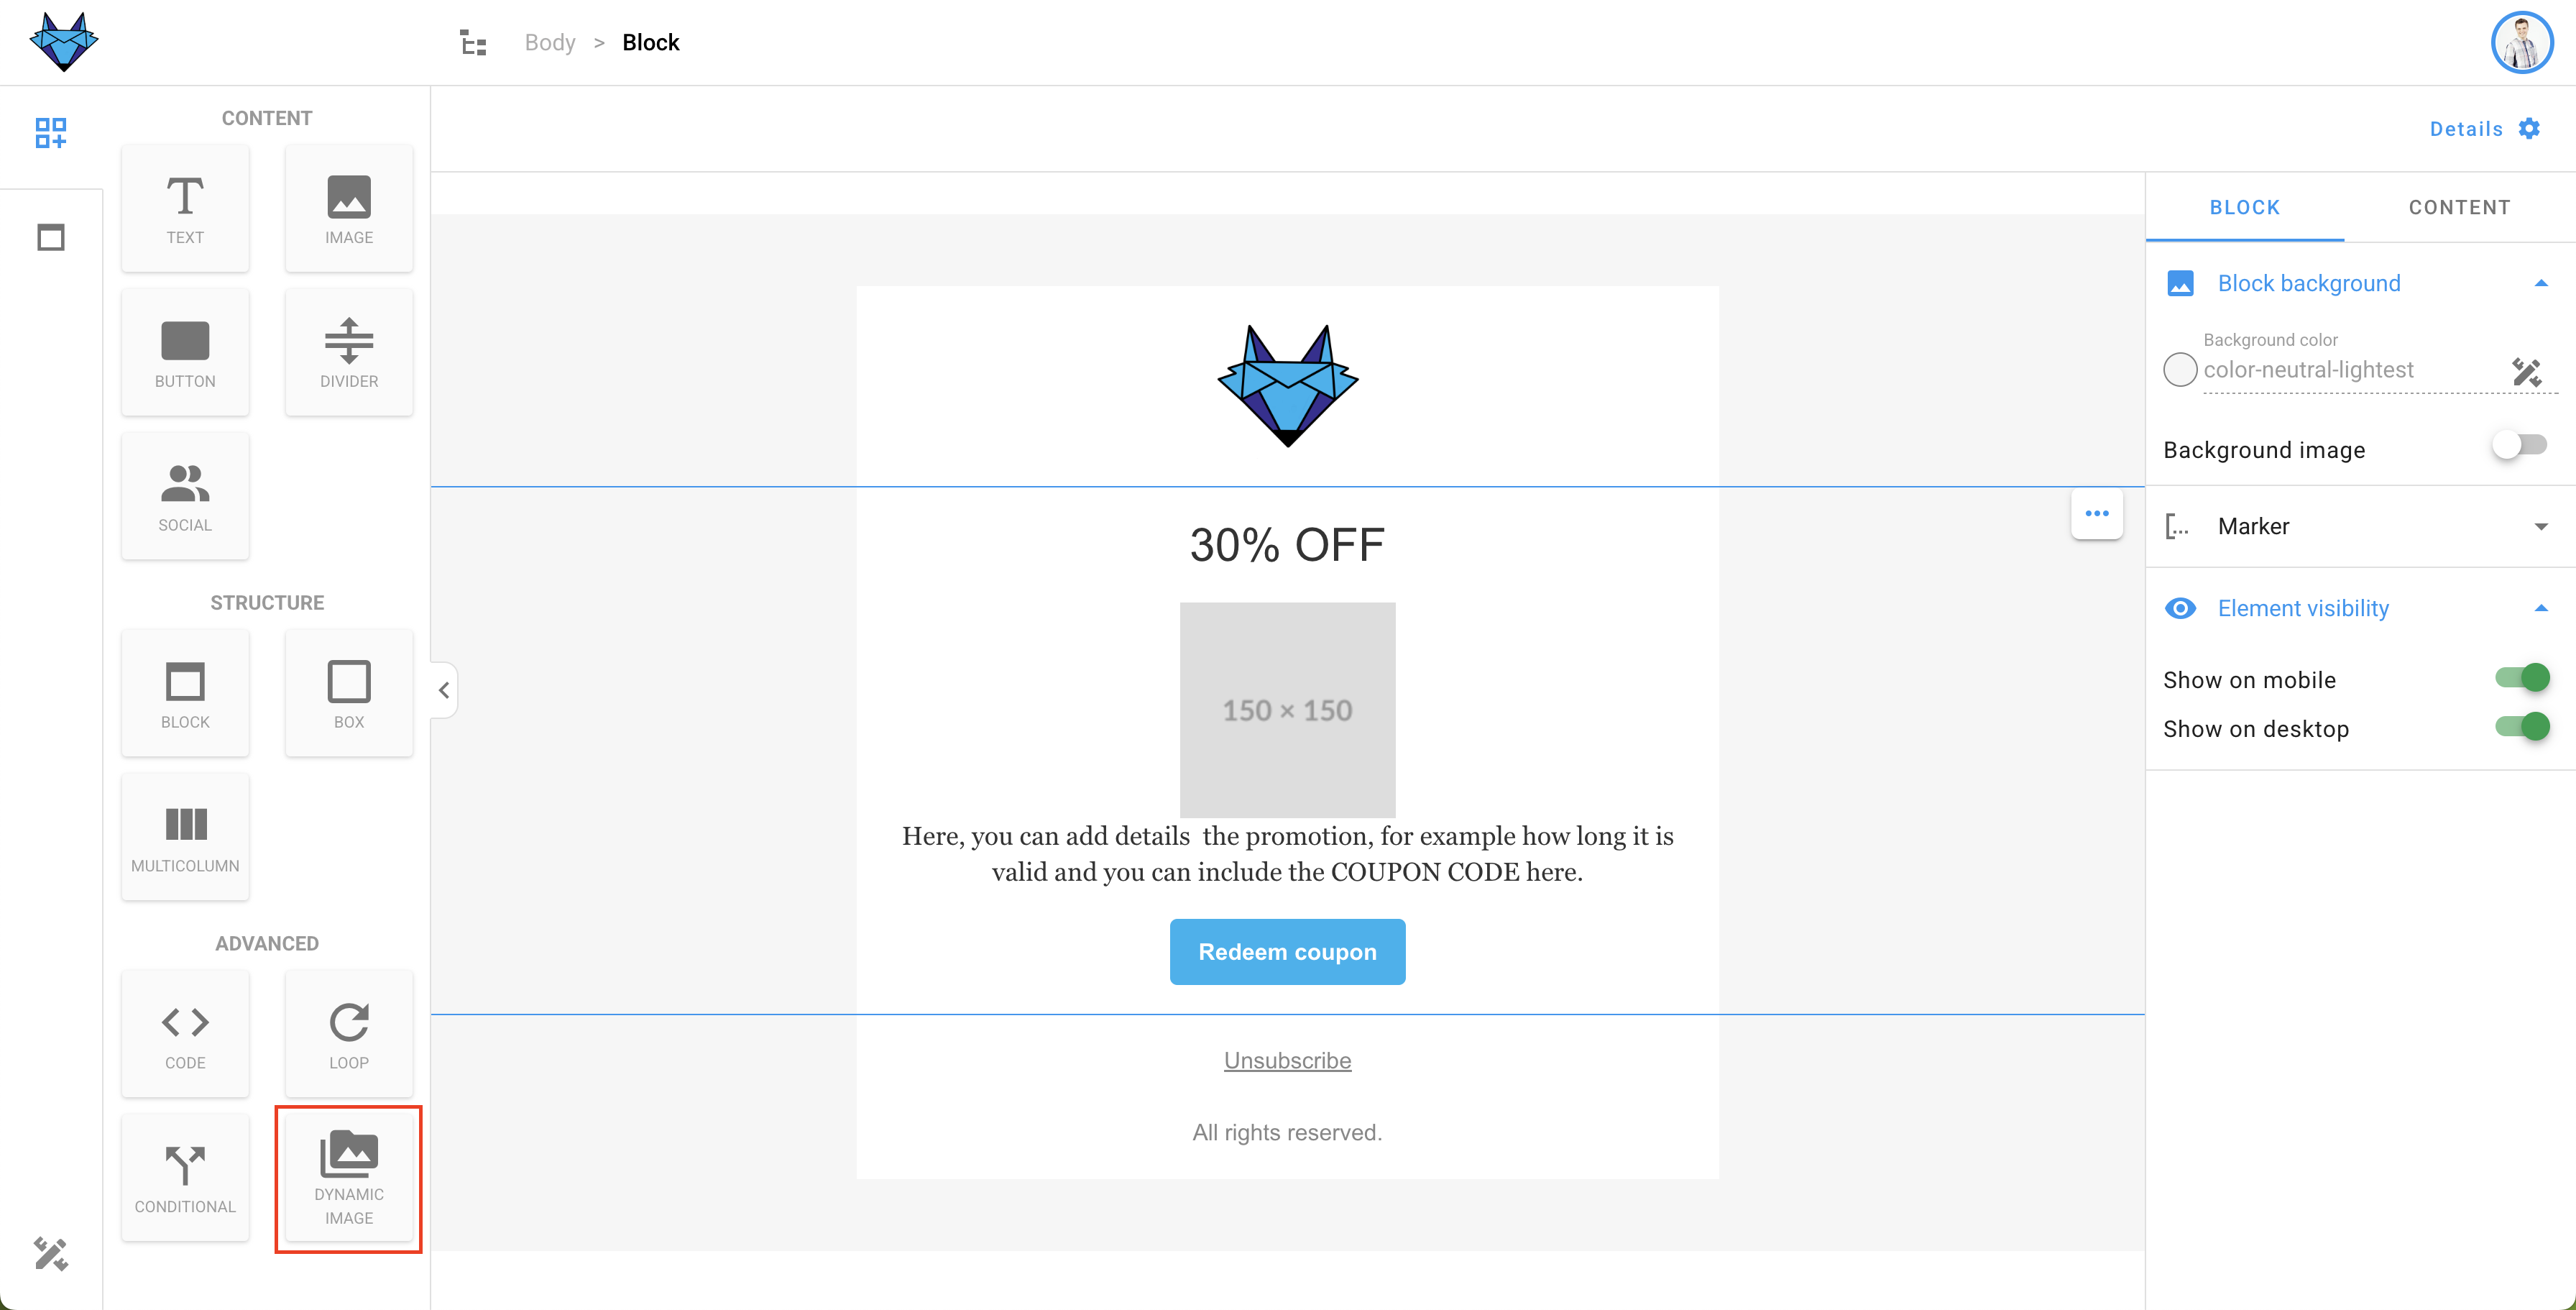
You can drag and drop a new dynamic image onto the canvas from the left-hand side:
Conditionals
You can create optional content for your recipients using conditionals. For example, if a subscriber is a premium user, you might want to show them extra content. You can also create geolocation-dependent content—or any other variation based on the data you have.
In the screenshot below, the expression button is highlighted. Clicking it opens the same dialog that merge tag buttons do. (Note: in conditionals, you don't need to add curly braces!)
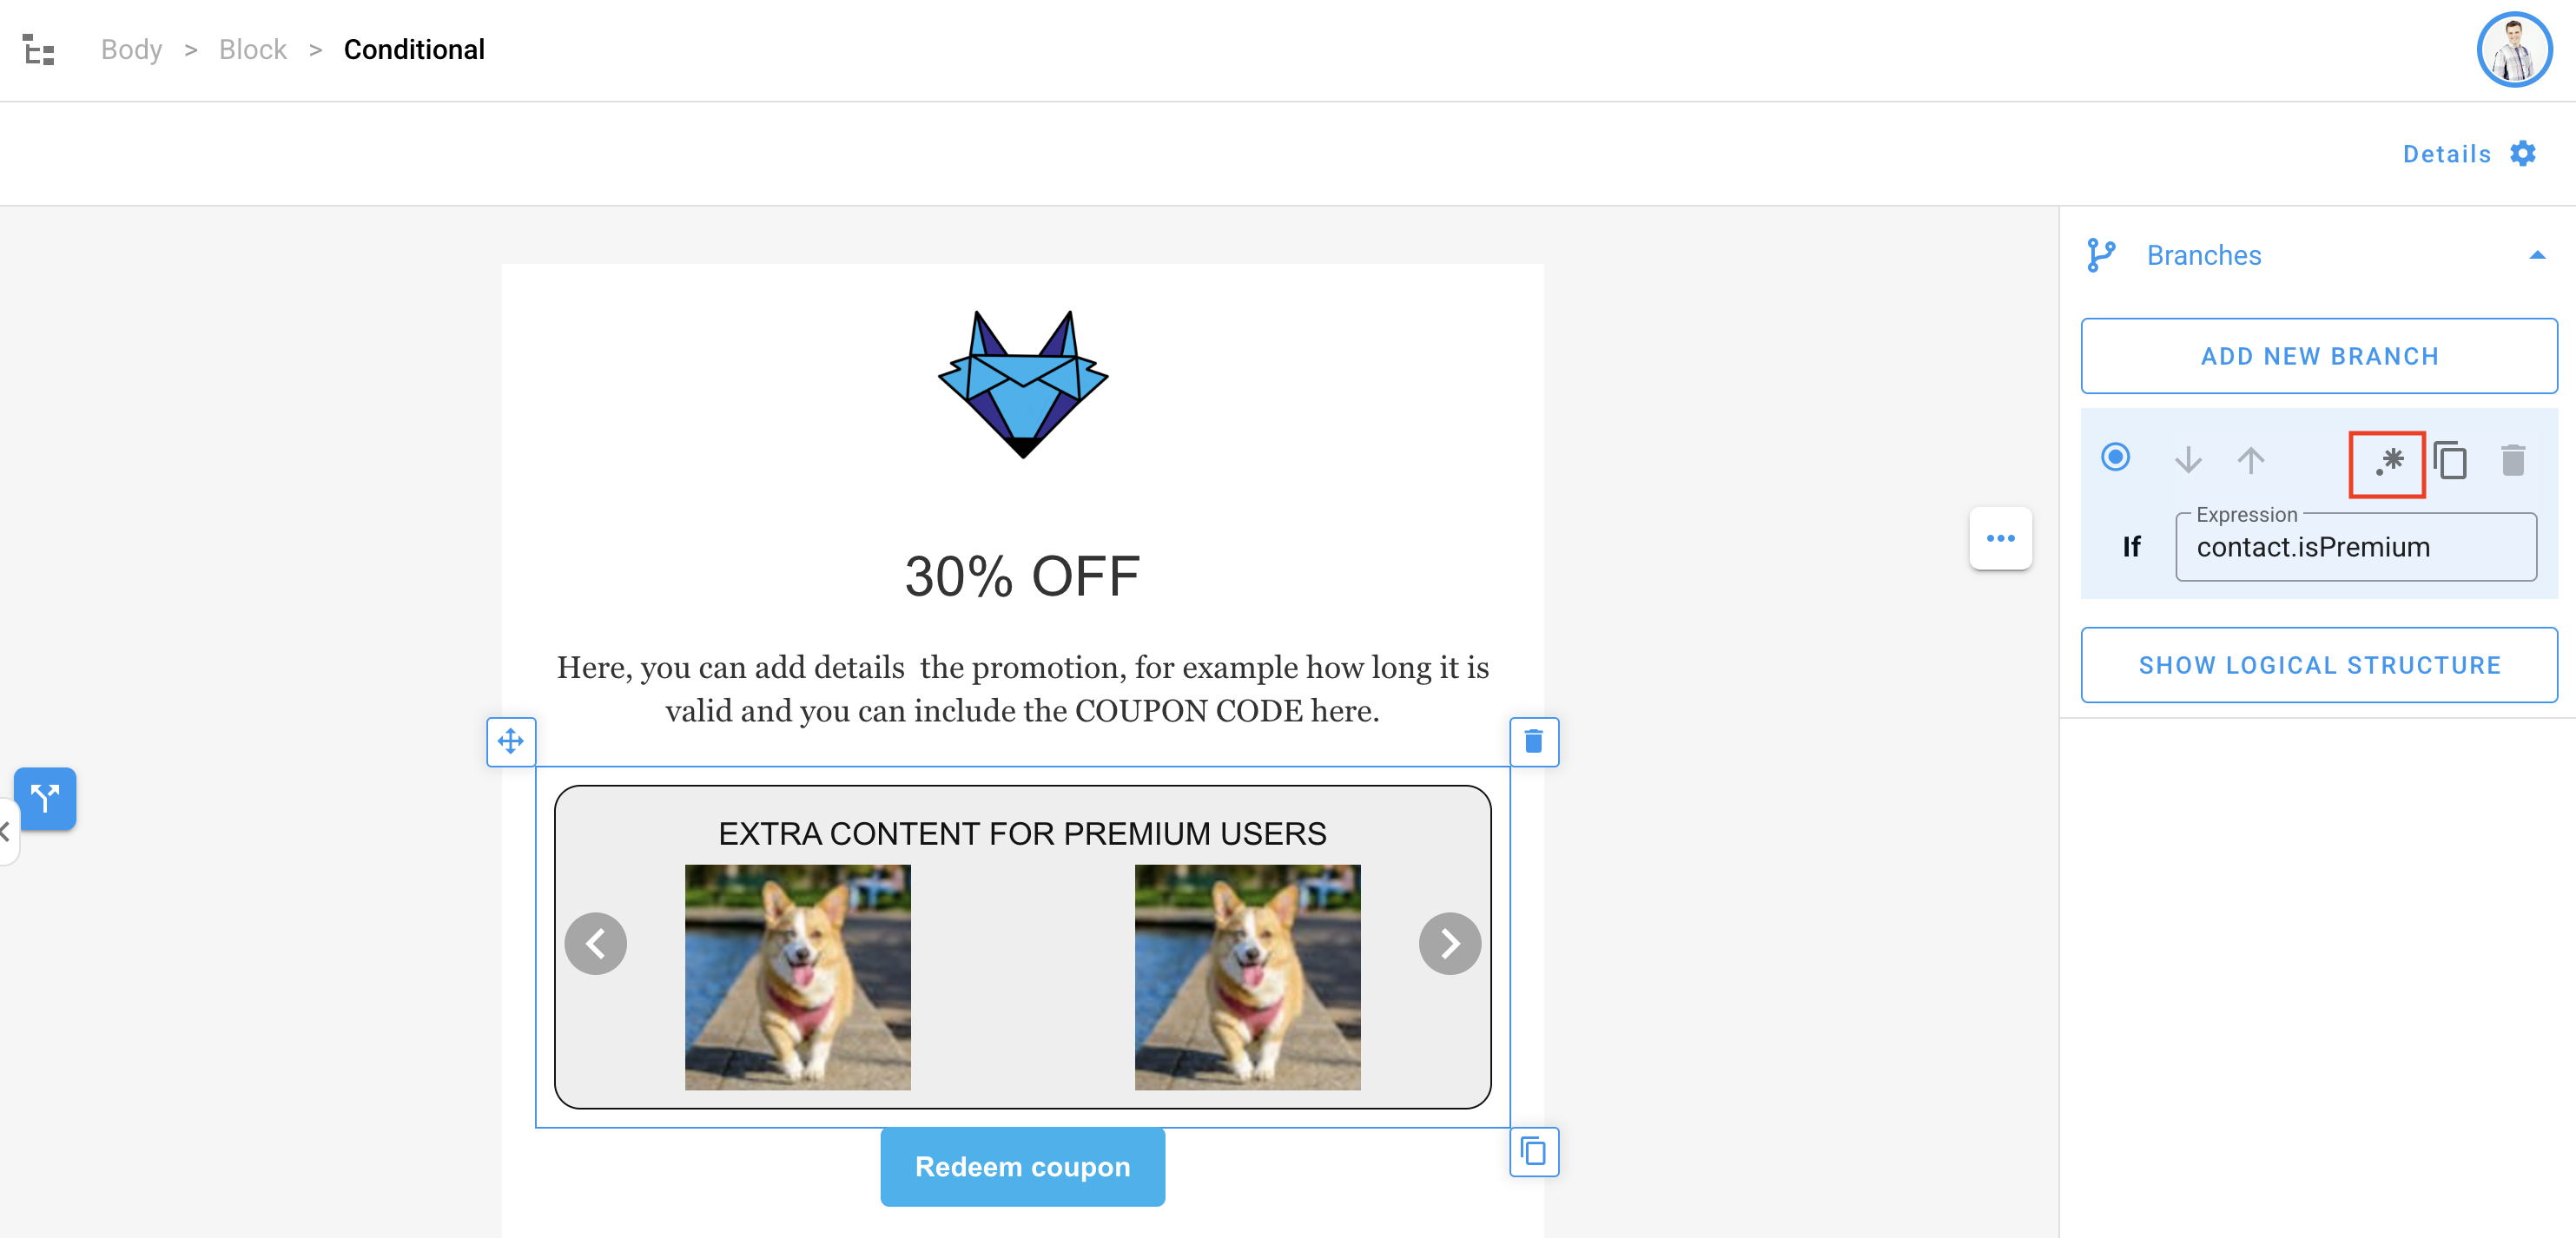
Conditionals can contain complex layouts, not just simple elements.
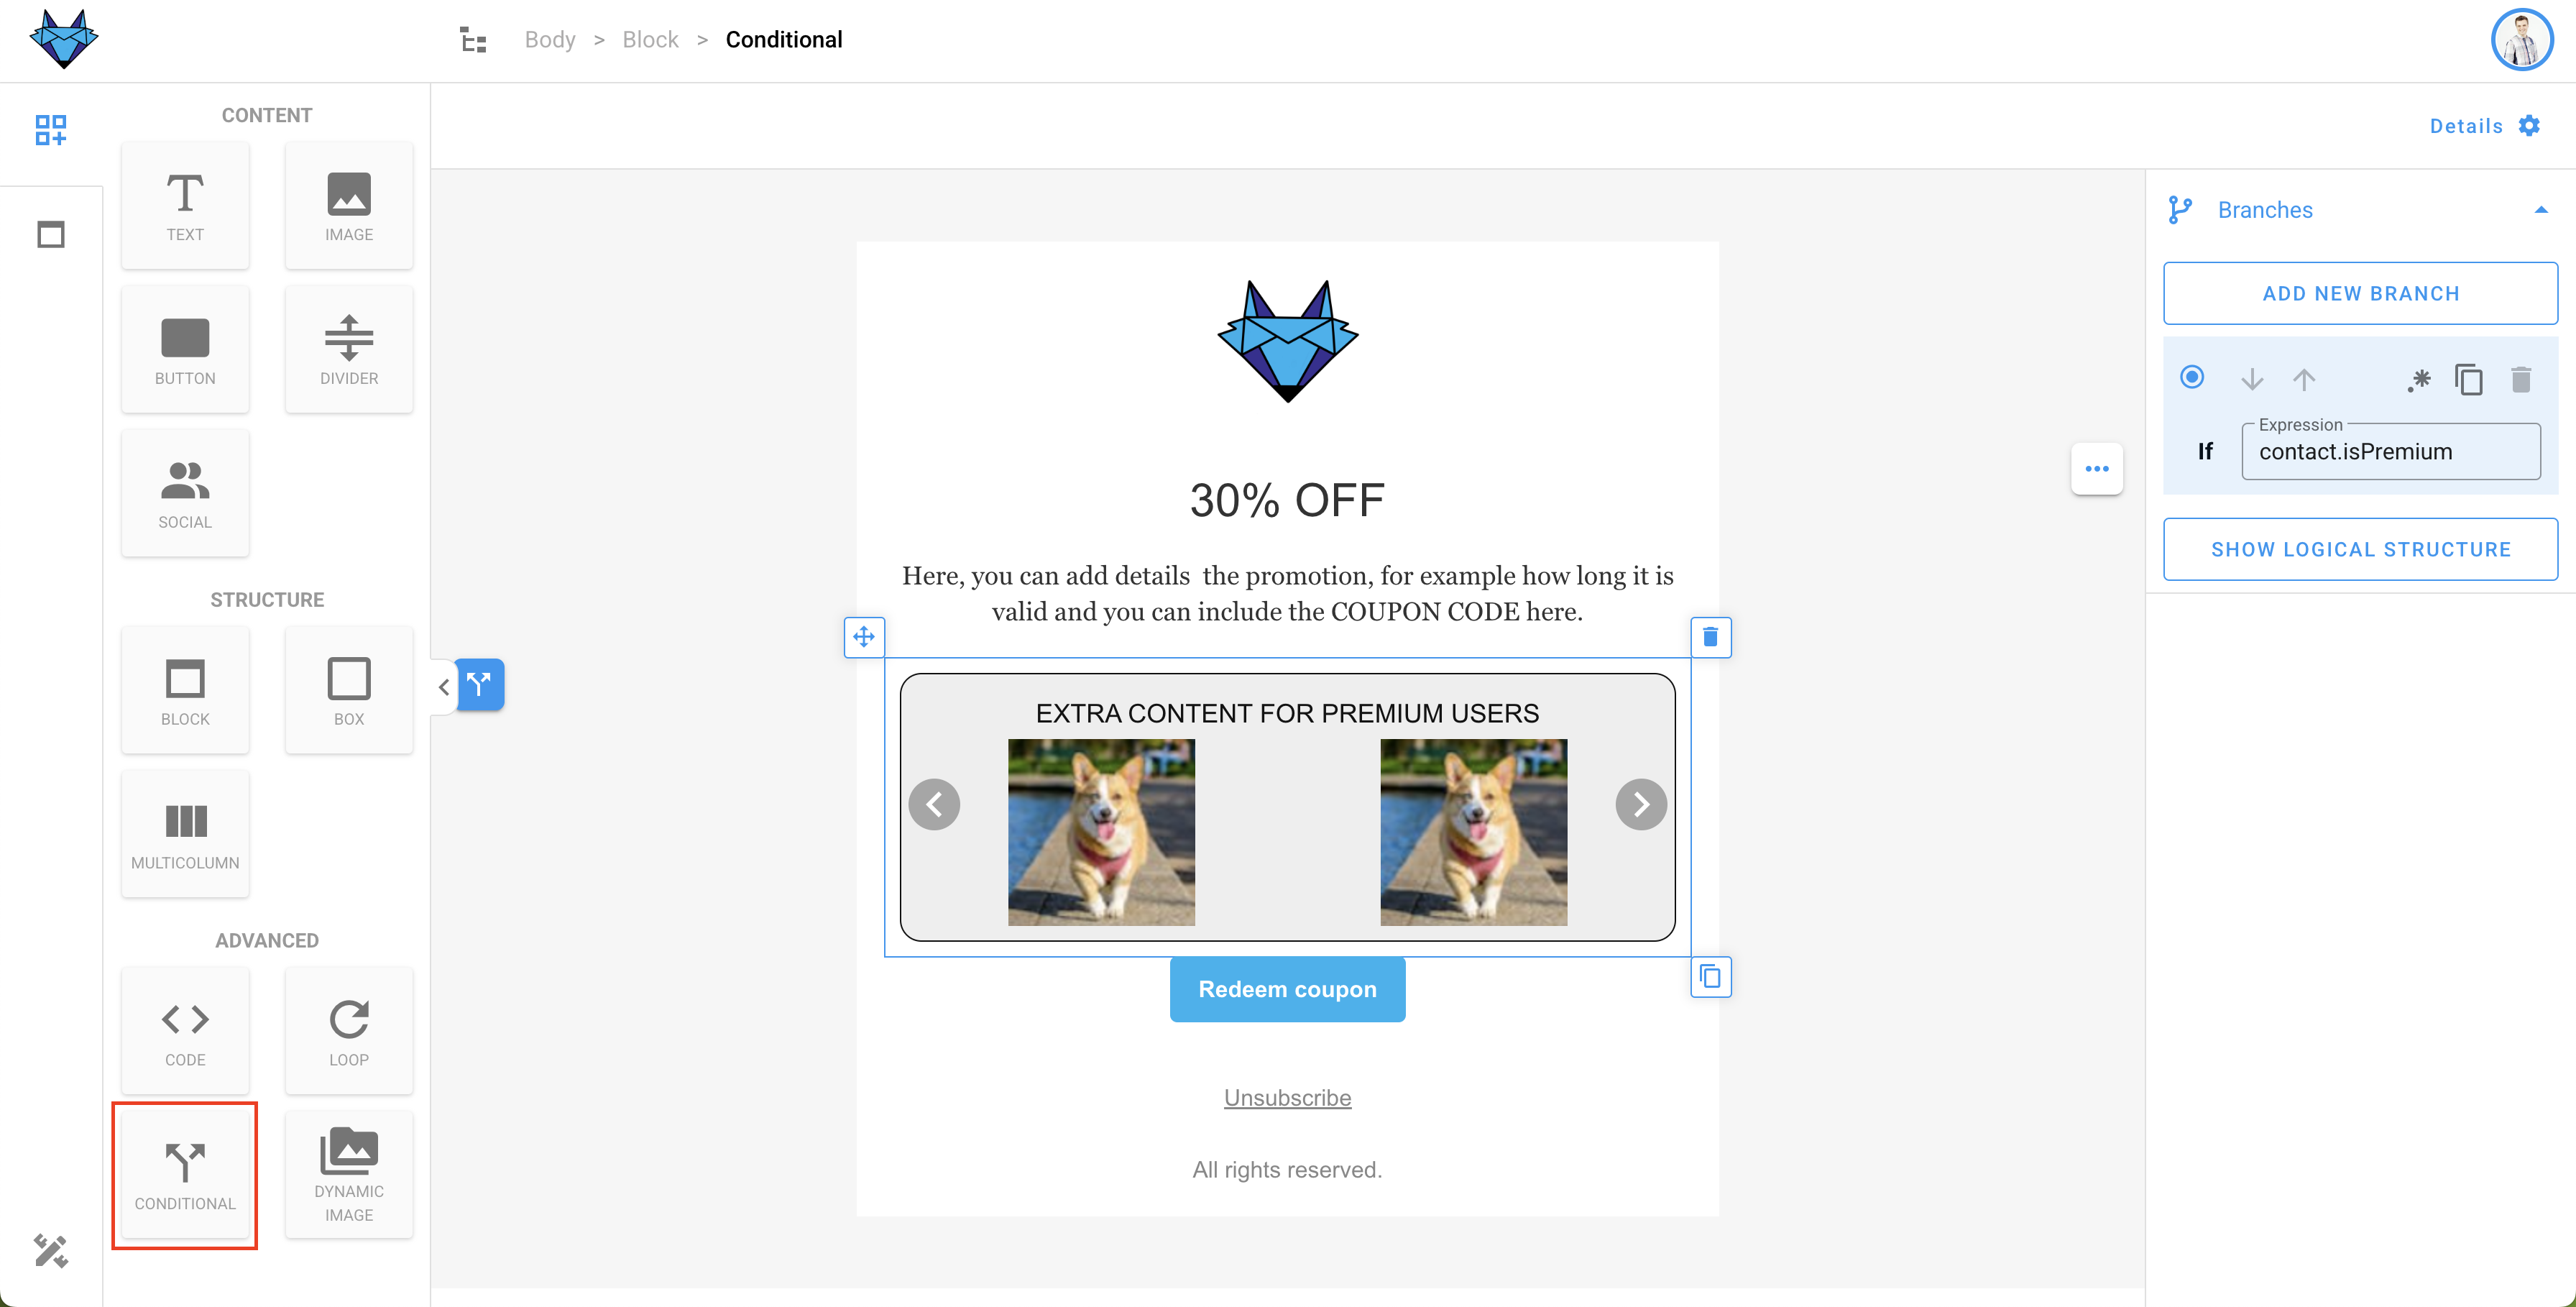
You can drag conditional blocks into your email from the left-hand side of the editor:
Loops
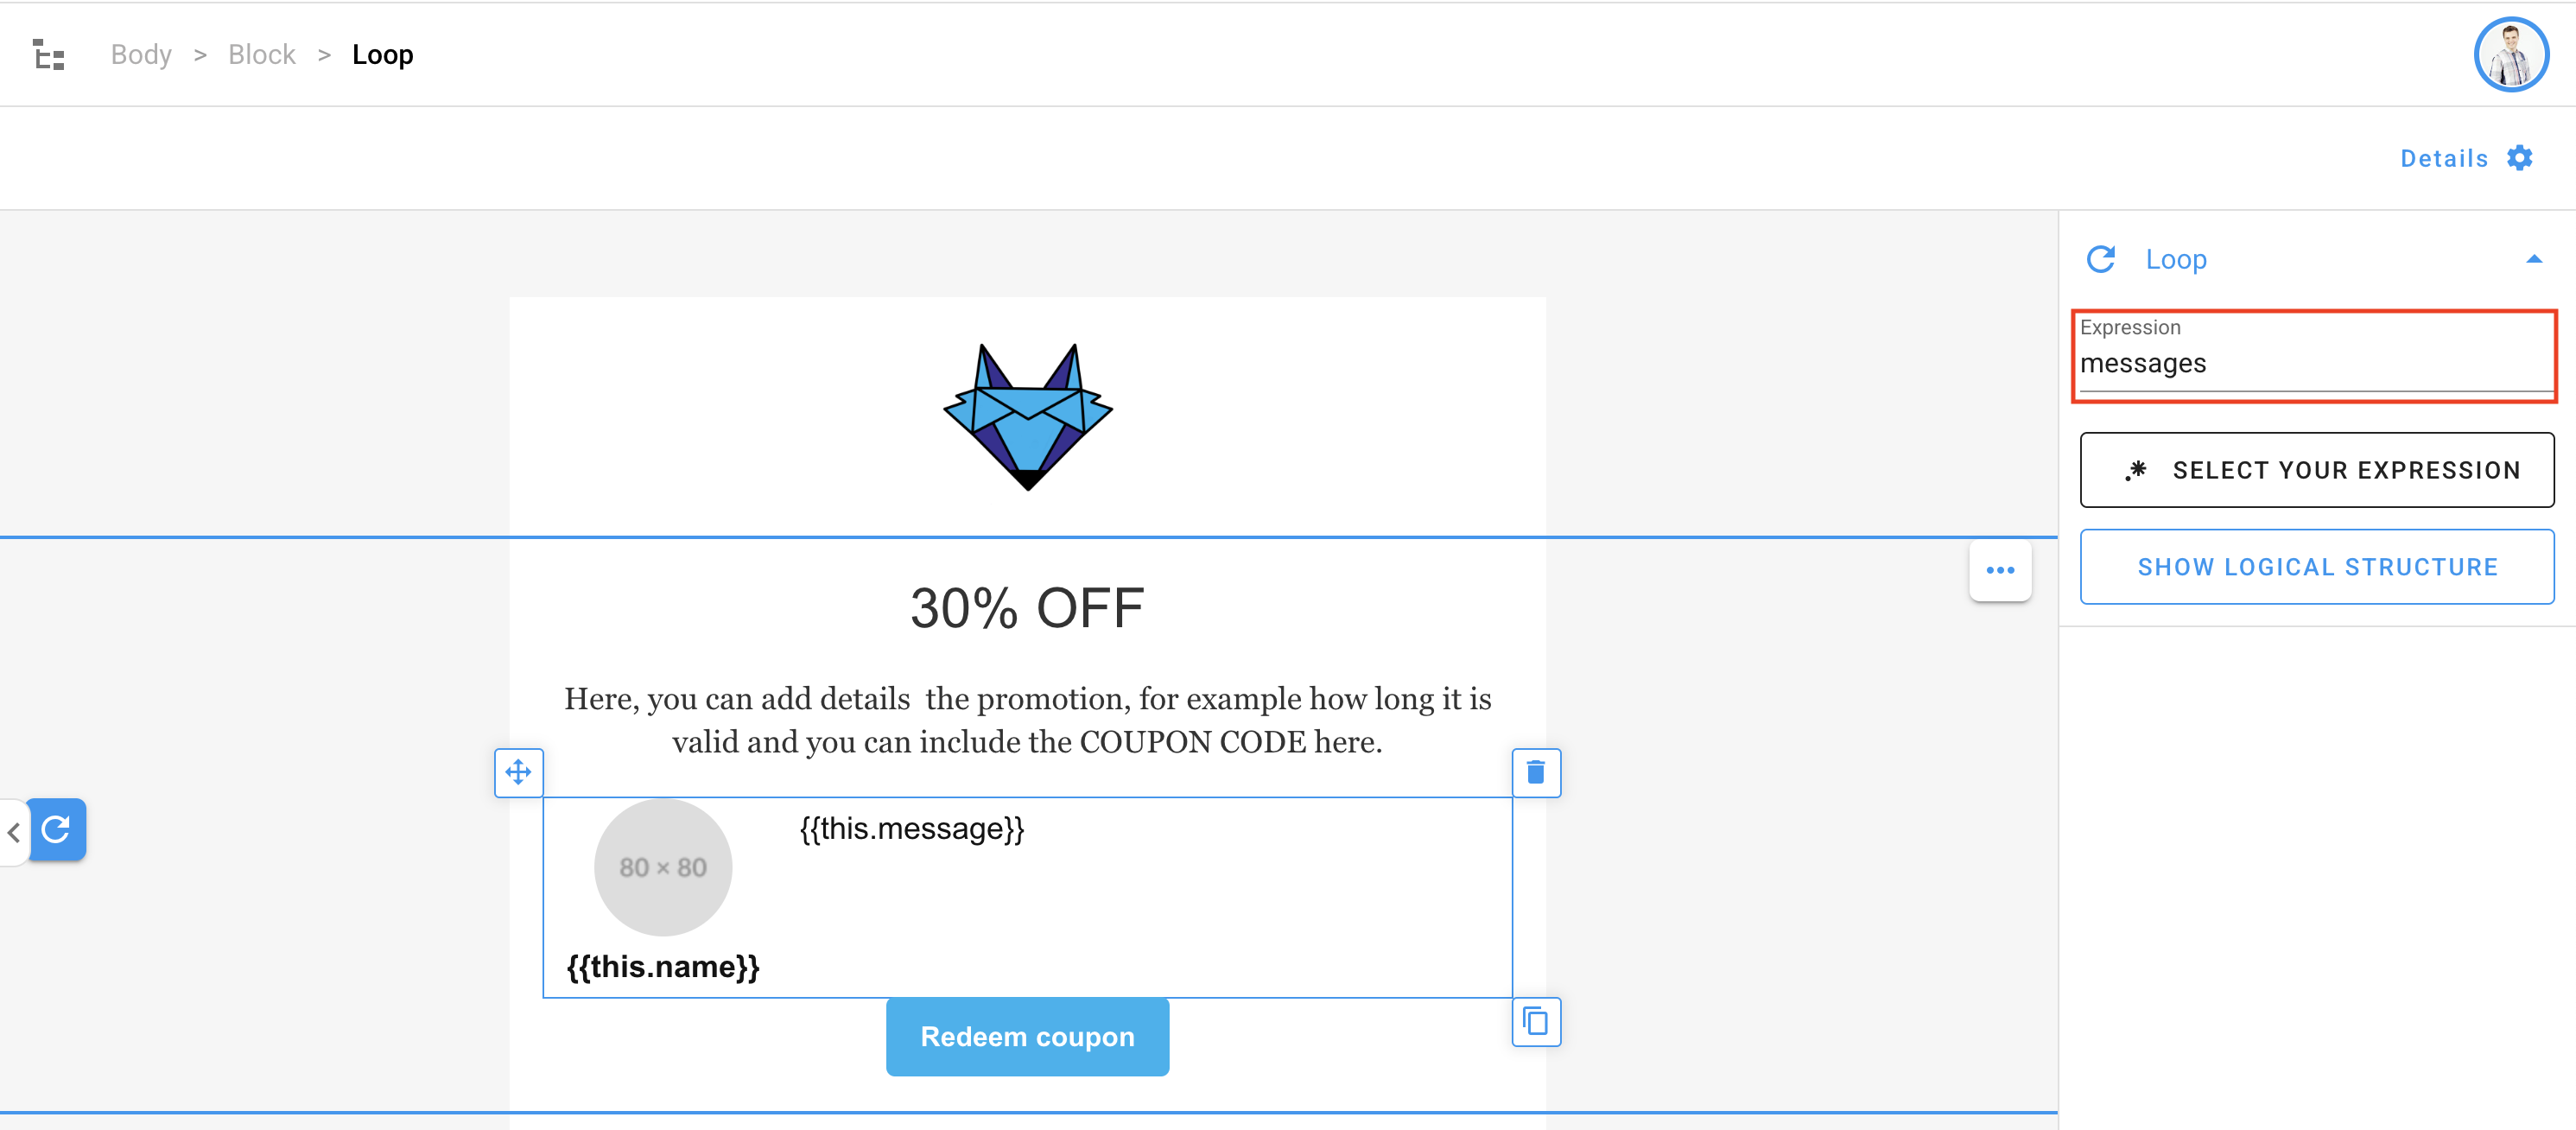
With loops, you can iterate over an array of elements. This allows a section of your template to repeat as many times as there are items in your array. Each item can be an object, and inside the loop you can refer to the current object using the this keyword. For example, you could show multiple messages, products, or articles.
The expression you provide in the loop must be the name of the array you want to iterate through. Loops in bluefox.email use the Handlebars each helper behind the scenes.
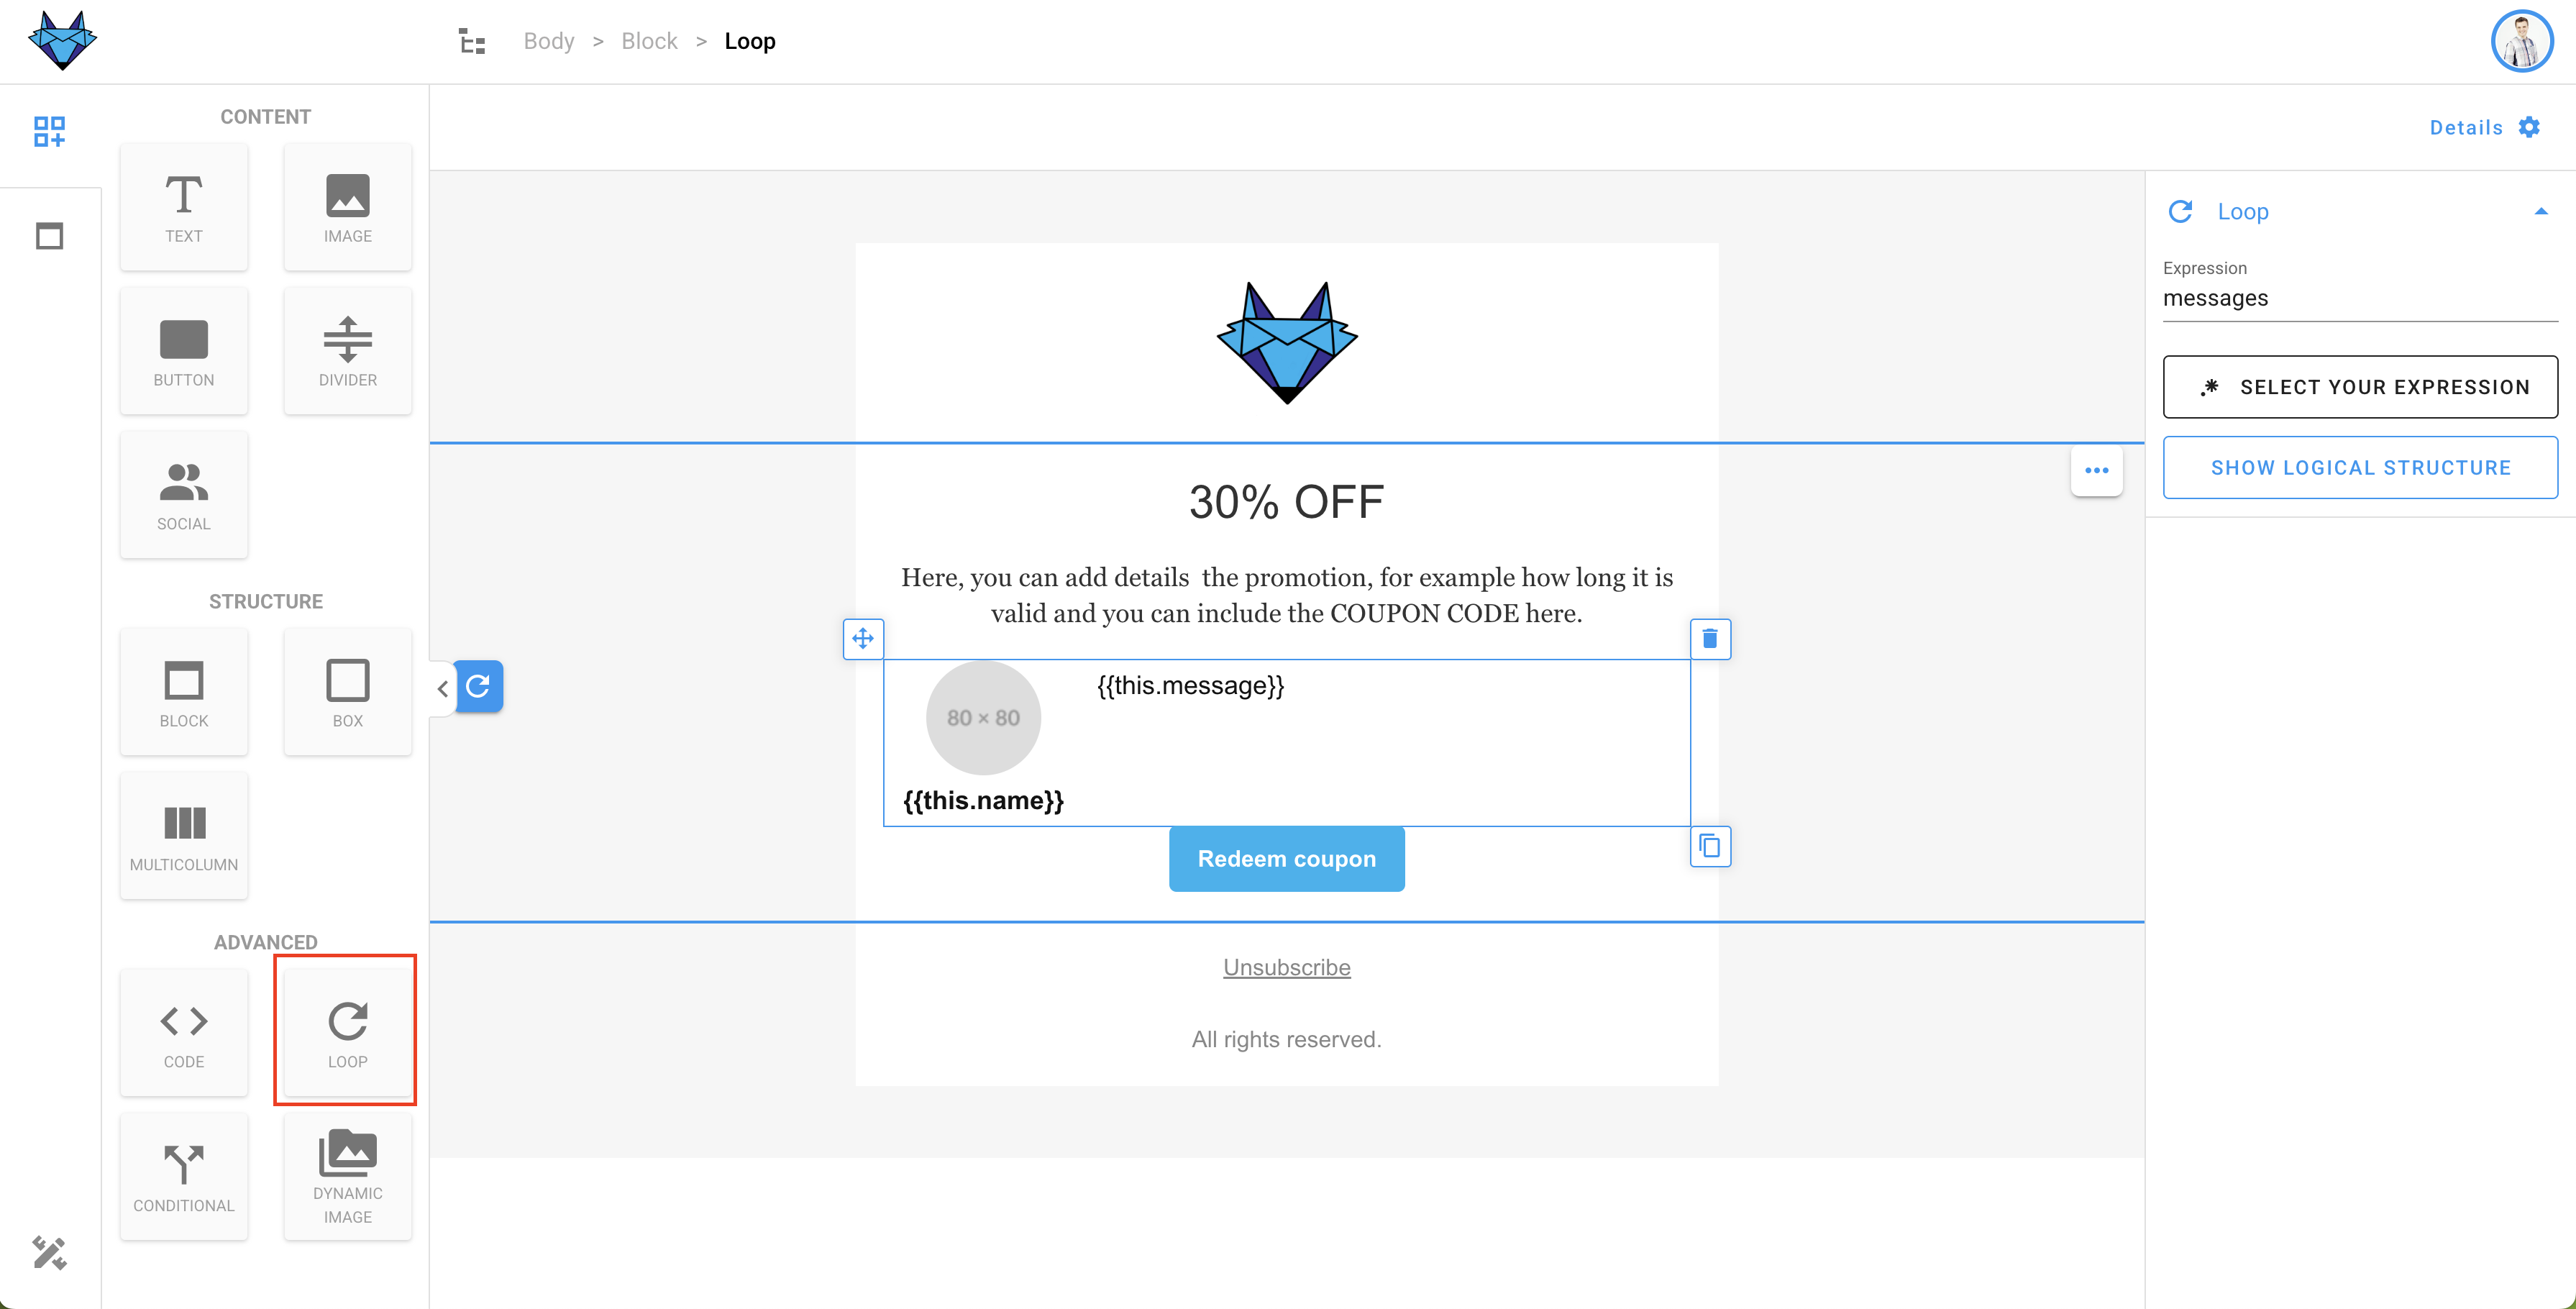
You can drag a loop element onto the canvas from the left-hand side:
Handlebars Extensions
Since Handlebars' default functionality is quite limited, we've added a few helpful extensions to make your life easier.
Each with Skip and Limit
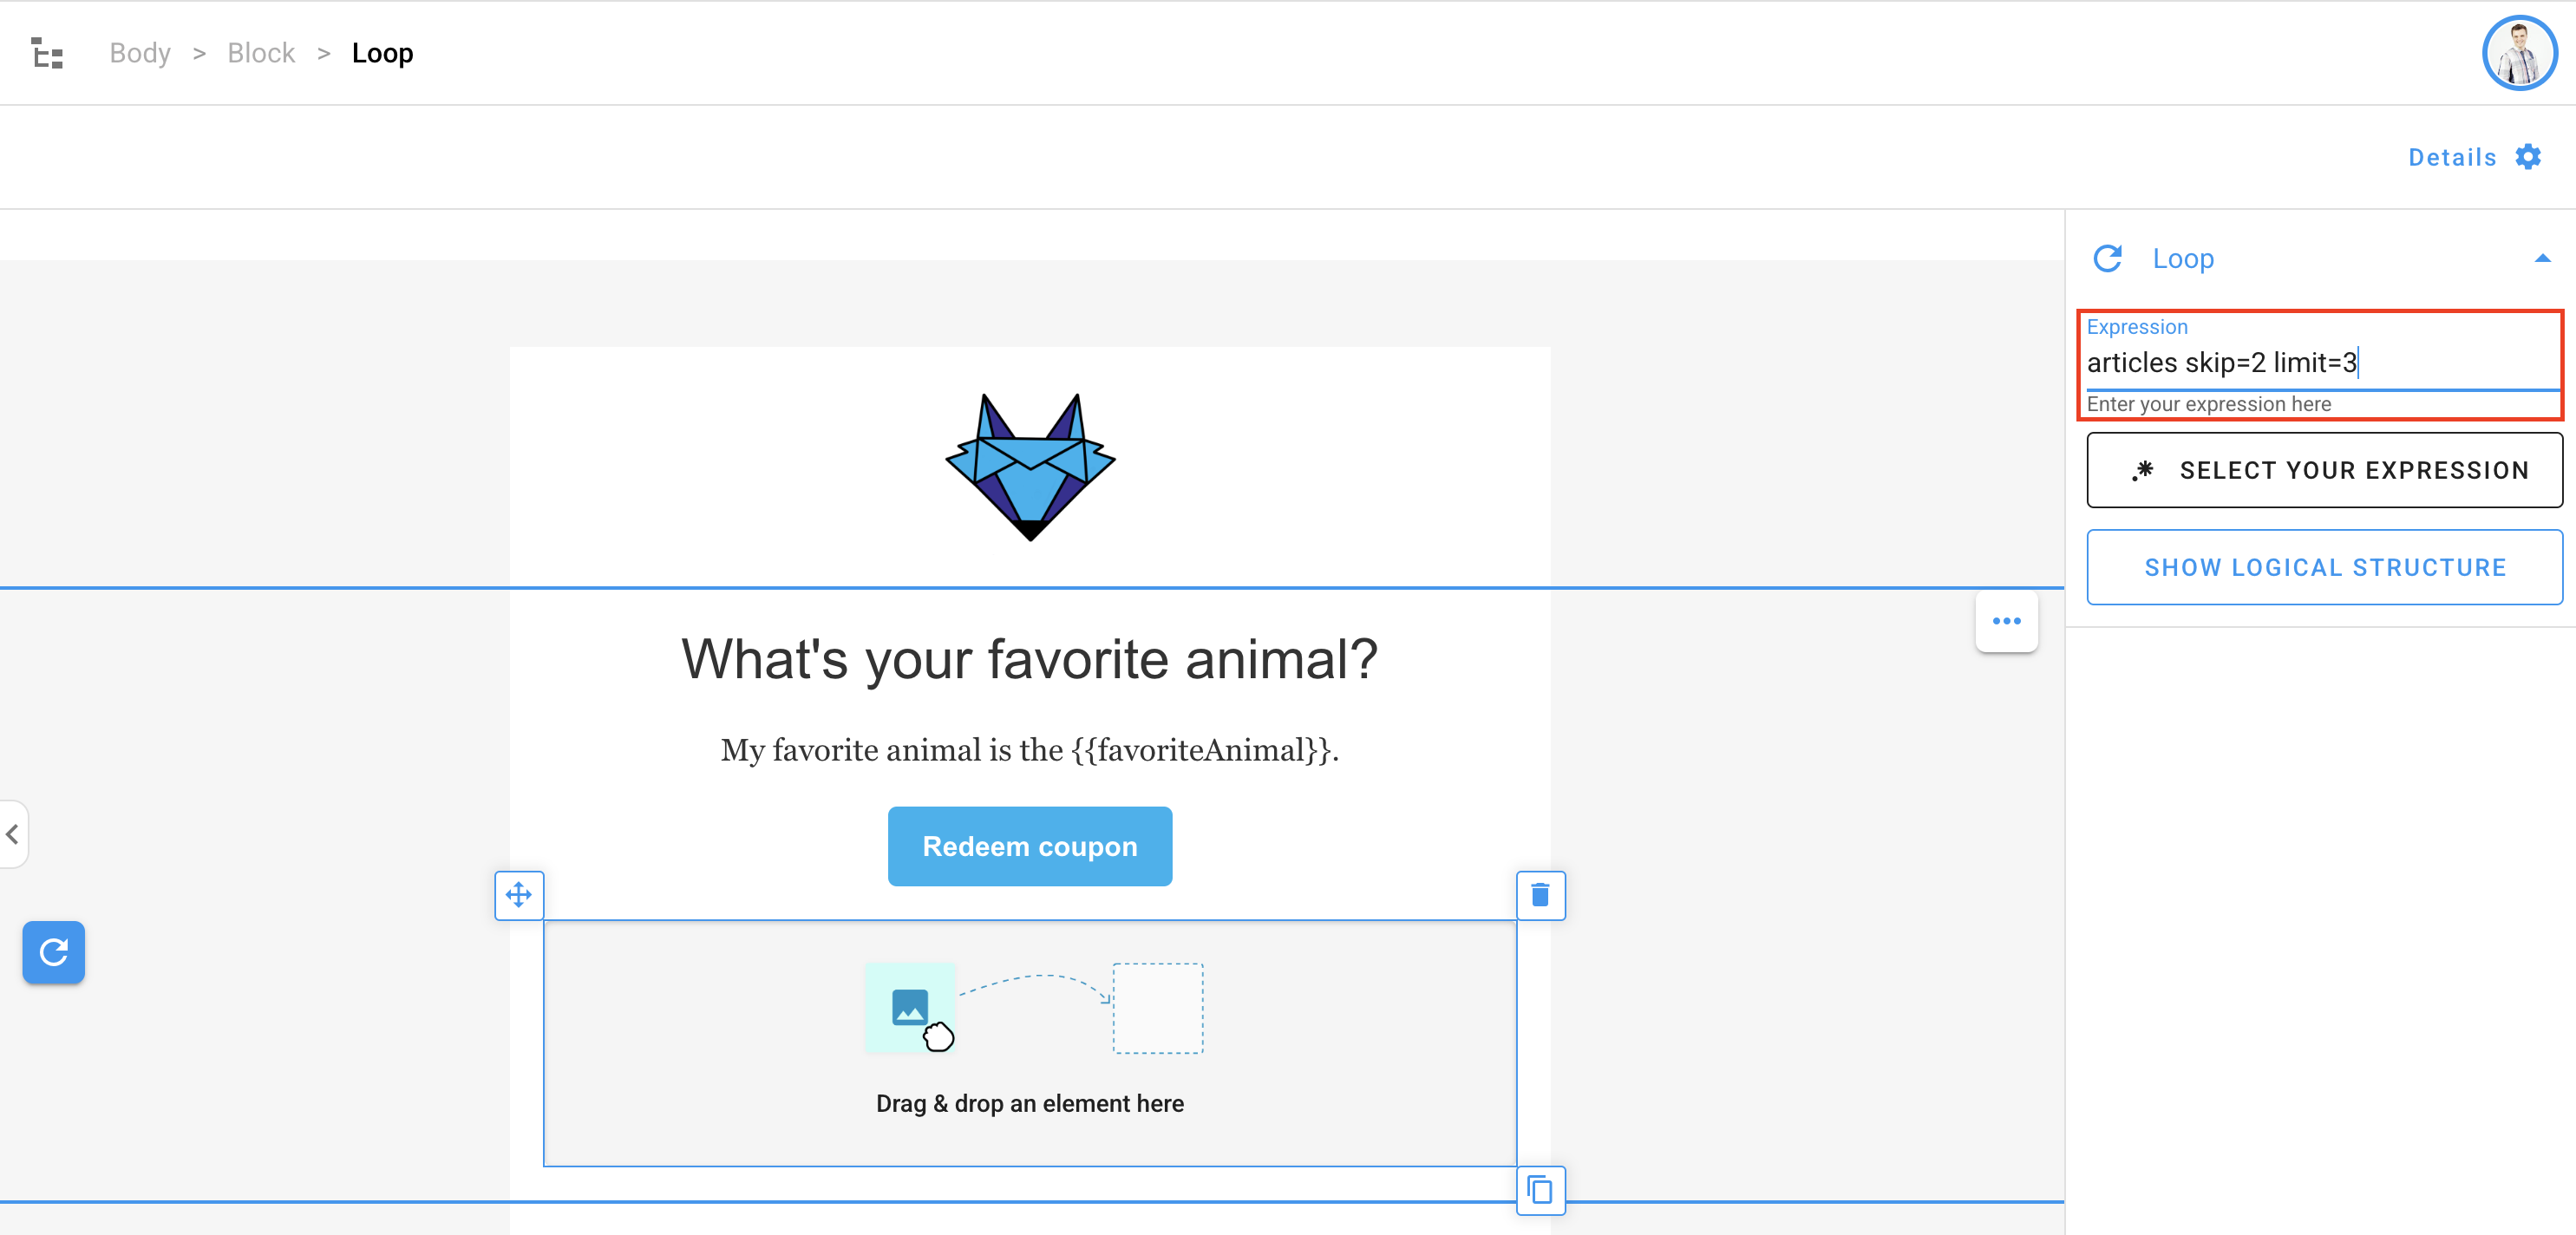
We extended the default behavior of each by adding support for skip and limit.
The example below skips the first two articles and only iterates through the next three:
{{#each articles skip=2 limit=3}}
  <!-- something here -->
{{/each}}
You can add the skip and limit values directly in the loop expression in bluefox.email:
Logical Operators
Handlebars conditionals are quite limited by default, so we added support for common logical operators you might be used to.
You can write logical expressions in the expression input of any conditional element:

AND
The AND operator supports any number of arguments:
{{#if (AND condition1 condition2 condition3 ...)}}
  {{!-- Your code here --}}
{{/if}}
OR
The OR operator also accepts multiple arguments:
{{#if (OR condition1 condition2 condition3 ...)}}
  {{!-- Your code here --}}
{{/if}}
NOT
The NOT operator accepts a single argument:
{{#if (NOT condition)}}
  {{!-- Your code here --}}
{{/if}}
EQ
The EQ operator performs a strict equality check using JavaScript's ===. It returns true only if the value and type match exactly:
{{#if (EQ value1 value2)}}
  {{!-- Your code here --}}
{{/if}}
INCLUDES
The INCLUDES operator checks if a value exists in an array. Like EQ, it uses strict equality:
{{#if (INCLUDES array value)}}
  {{!-- Your code here --}}
{{/if}}
Combining Logical Operators
You can also combine operators. For example:
{{#if (AND (EQ user.status "active") user.isPremium)}}
  something here...
{{/if}}
String Manipulation
We’ve also included a few string manipulation helpers, so you can handle formatting directly in your templates—no need to adjust your backend just for that.
You can use these anywhere text input is allowed:
CAPITALIZE
Converts all characters in a string to uppercase:
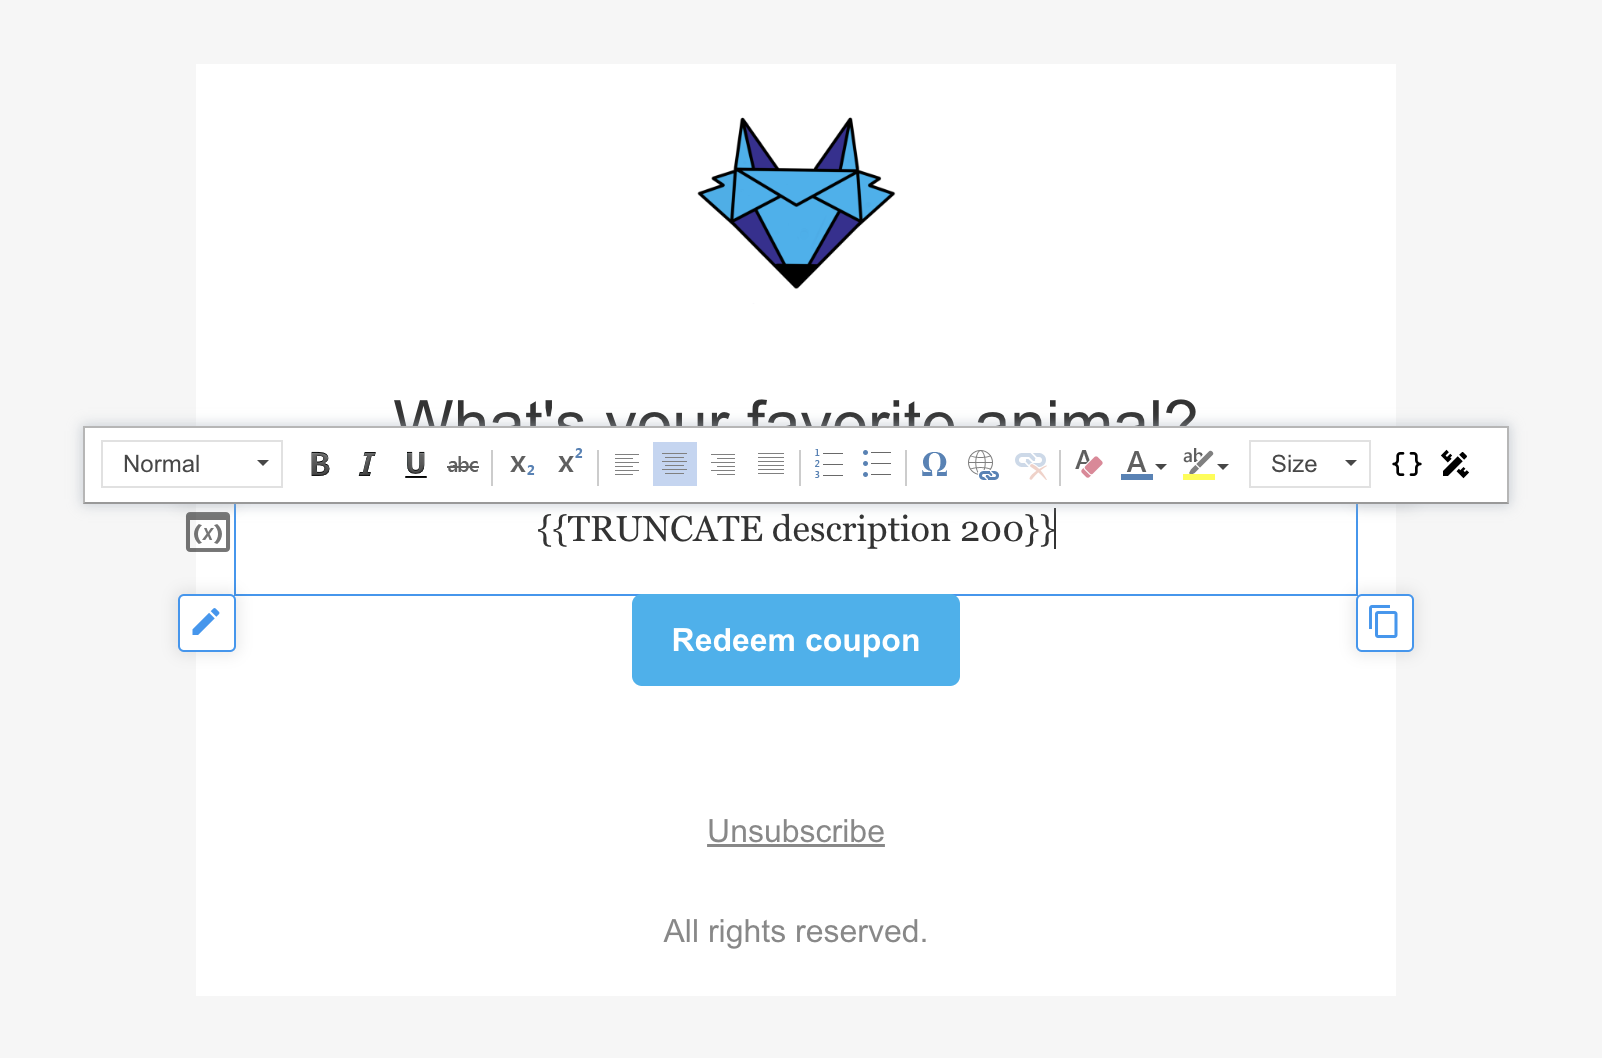
{{CAPITALIZE string}}TRUNCATE
Limits the length of a string and appends ... to the end. This is especially useful if you don’t know how long a string might be in your triggered or transactional emails.
{{TRUNCATE text characterNum}}